This is my 4th project, and it was total different from the 3 others we have had. In this project I was challenged in many different ways. For me, this was a light-project. I really want to get good on light-setup, but as I have experienced in this project, it takes a lot of time and is necessary to find shortcuts and a good workflow. I’ll talk more about the workflow later. First I will just establish what the goal for this project was, and the thoughts of what I wanted to do with the project.
The goal of this project was to do the lighting in 2 different scenes I got from other fellow students. The scenes should be lighted completely unlike from each other and one of the scenes should have some kind of animation of the light in the scene.
What will I achieve?
So, I was now ready to start, and started asking for scenes from my mates. When I had 3 scenes, I checked them out, and saw what I wanted to do. From Einar Martinsen I got a living room scene with no materials, and from Alexander Fusdahl I got a scene of a tunnel with some railroad tracks. Since I had to do 2 different scenes, I wanted to do an architectural visualization of the living room, and something fairytale’ish of the tunnel. My first thoughts for the animation were for the living room scene, I thought I could animate the light going from early morning to night. Then I come up with the idea of making a light source flying through the long tunnel and stop in front of the camera and just get brighter and brighter. I went for the last idea, and a night render of the living room scene. One other idea I tried out, was to make the tunnel look like it was full of small sparkling lights, but when I tried it, it didn’t look as good as I wanted it to look.
Research.
My plans were now set, but still I didn’t feel that I could start working with the scenes. I felt that I needed to get some info and learn some more about architectural visualization renders. Many tutorials online for this subject, but I feel most of them lack something, so visited the gnomonworkshop page and bought some tutorials made by Jeff Patton. (http://www.thegnomonworkshop.com/includes/bundles/jpa_bundle.php Lighting Digital sets.) The tutorials were very good and gave me idea on how to get a good result and a good workflow. I also found a couple of tutorials about workflow when you are rendering in 3ds max, so I watched through them just to fresh up my mind. It’s always good to learn how to spend less time waiting. (can’t link from 3dtotal, but the tutorial is called “speeding up renders in 3ds max” by Alejo Grigera)
The living room scene.
I felt that I could start now, and could handle a architectural visualization render and don’t use to much time doing it. But I had forgotten that the scene needed to be textured, so I sat up the light and textured at the same time. I had to use photometrical lights so I could get realistic light, and the opportunity to use IES profiles. IES profiles are files that are made by light manufactures. The files contains information and makes the light realistic when it comes to the intensity, fall off, shape of the light and so on. I got my IES files from www.lithonia.com.
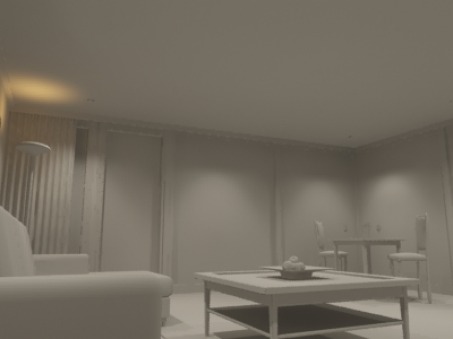
Material override in Mental Ray
When I start lighting up a scene I often use the Material Override button, so I don’t have to wait for the render to get all the textures. This gives a good preview of how the scene will look, but if your texture is darker, or reflective in some way, you will get another result because of the bounces of the light. Just good to keep that in mind. For this scene I used Global Illumination and Final Gather together. The render will then calculate the light a bit faster than the Final Gather alone. To control the light easier, I used the mr Photographic exposure control. After what I saw when I did a pretty high quality test render, I needed to change some small things.
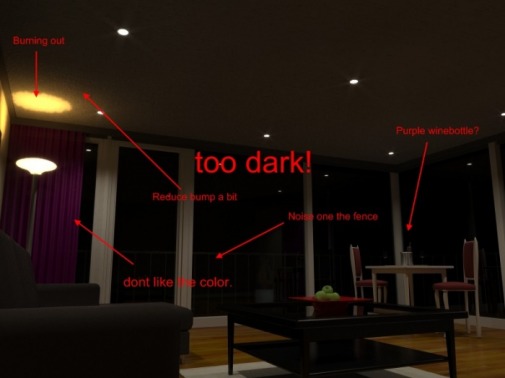
Things i wanted to fix
Since I need this glare effect to get a nice look, I turned on the glare effect in the output channel of the camera. I really don’t want to calculate the light and photons each time I render, so I made sure that I generated a Final Gather map and a GI photon map, and saved both. This means that I can just render the image, and I don’t have to calculate the light each time. So I can change the glare options and just render. No calculations. A time saver deluxe.
The glare is out of controll
So after a final render with the glare effect, I spotted some things I didn’t like. I did fix the exposure control to get a brighter render, and this affects the glare effect. The glare effect does parts of the light in the image brighter and adds some streaks. A part of the curtain gets affected by the glare, but that I fixed in a quick way. I just rendered out a map with the glare only and removed almost everything from the scene. Now I can control the glare in photoshop, just added it as a new layer and made them fit together. Since the lamp shouldn’t have as much glare as the spots, I added a new layer with the lamp only and just toned it down.
the glare map
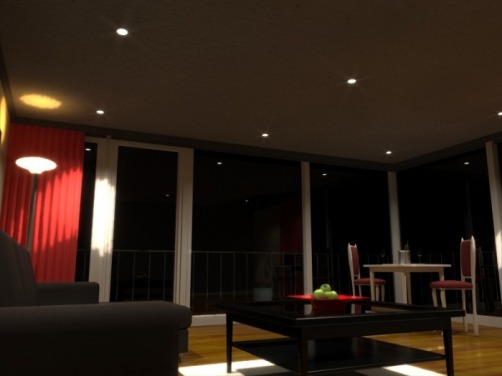
I am really happy with the result, but I feel that I didn’t get the look of the curtain right. Something there that doesn’t look right for me. Feel that I found easy solutions on the problems that popped up. Great to feel that I can solve problems without doing too much searching for solutions. One thing that might be a bit weird, is that you can see all of the things outside very well, maybe a bit more reflection in the window?
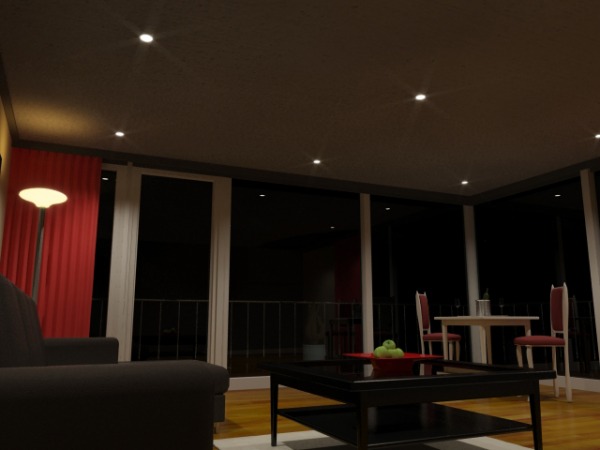
Final Render
NB: Models by Einar Martinsen
http://www.cgtorch.com/
Texture, Lights and Render by me
http://www.cgtorch.com/
Texture, Lights and Render by me
The tunnel scene
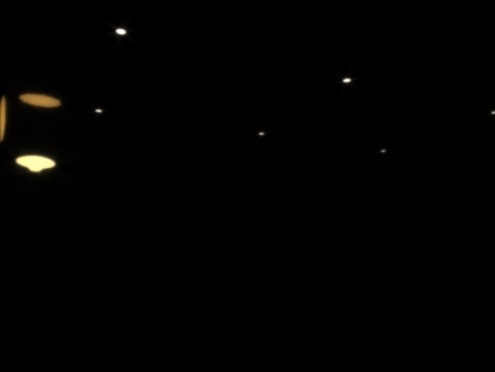
My first try at this one, ended in failure. I tried to set up many lights in different positions with a whole lot of various colors, from a purple, pink and blue, and almost to red. In my head, I wanted it to be a lot of sparkling lights, so I tried with the glow feature in max. The problem with this is that I need a ton of different glow, almost one to each light. Takes a hell of a lot of time, but I tried, and did some test renders, and saw that this didn’t look the way I wanted to. Threw away some hours there, hours I don’t really have.
So I started again. This time I just went for light in the sealing, about 20 of them. I wanted it not to be too bright so you can see the light-ball-thingy come down the tunnel. The tunnel is very long, so I didn’t light up all of it because I knew that it will kill the render time and it would have been the end of this project. Since the texture is so dark, I didn’t use the material override feature, because I think it would look really different from how it will look with the textures on. After I felt that the light was good, I started creating the light source that come flying down the tunnel. I did a quick sketch in photoshop, so I knew about how I wanted it to look. Colorful. I did a couple of test renders and at this point I should have understood that I had to set down the quality before I didn’t a complete test render of the animation. But I didn’t. So the animation test render took about 3 hours or so. At least I did something reasonable in the time I waited.
I didn’t quite like the way the two orbs where flying around the light source, so I added 2 more to get more chaos. I also wanted the flying light object to make the other lights behave strange when it passes by. I wanted them to flimmer a bit. Took me some time to get a result I can say I am happy with. The light in the sealing also got a bit different color to give it a warmer look, since the flying light is cold, so I get some opposites colors in the render. Here is some renders that shows the progress of the light in the sealing.
When I got that straight, I went on with a final render test without final gather. this means that the scene will be a bit darker, but I will see the movement of the light.
I adjusted one of the orb path and made the scene a bit brighter before I did a final render.
NB: Models and Texture by Alexander Edward Fusdahl
http://www.insanetk.com/
Lights and Render by me
http://www.insanetk.com/
Lights and Render by me
The main idea was that the tunnel should be looking a bit dull and that the light source should catch your eyes and surprise you by “blowing” up. I think I got some of the look that I wanted, but think I could have done better by planning more and really got a good plan for this scene as I had for the other scene. If I had more time, I would prolly made the lights a bit more interesting and made the orbs not so colorful. Feel that it is too much color right now. Overall I am happy with result when I think of the amount of time I have spent on this one.
Artistic Influence
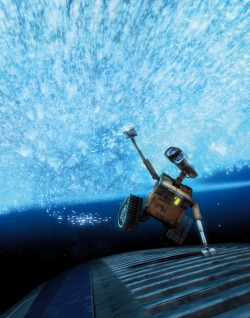
I need to write something about my Artistic Influence, but I really don’t know who or what that is influencing me. Of course for this project, Jeff Patton has influence me because of the tutorial.I think the lighting in Wall E is brilliant. I love the way they play with the light, and when I made the light source I thought of the scene where Wall E is flying in space and touching the space dust.
Artistic Influence
I need to write something about my Artistic Influence, but I really don’t know who or what that is influencing me. Of course for this project, Jeff Patton has influence me because of the tutorial.I think the lighting in Wall E is brilliant. I love the way they play with the light, and when I made the light source I thought of the scene where Wall E is flying in space and touching the space dust.
Last words now. I feel that I have learned a lot about a good workflow and how to achieve a good result when it comes to architectural visualization. I am pleased with the results, but know that I can improve much, and that I will do. I will start to play a lot more with lights, because light do set the mood in every setting. I know that I have to plan even the smallest parts of a scene.
 RSS Feed