18 weeks has past like a storm. The movie is now done, and delivered. This will be the last blog post from that project. But new projects will be wrote about, so stay tuned. This is a reflective post where I look back, and try to put words on what I have learned and experienced.
Let’s reflect.
First of all, this project started out with frustration. I was standing without a group, but what I thought was awesome story that should be told. Other was feeling the same way, but my teacher did not like it. That’s fair. He didn’t tell me to not to it, on the contrary he told me that he would help me make it better even though I chose that story. A great teacher and person. Many reasons not to do my story really, the main was that Knut Eliassen was looking for a group, and I wanted to work with him. And the rest is history.
Together with Fredrik Pettersen and Mats Hovind we made a story like no others. I am proud to say that our story is well thought through and we have been brave in some of our decisions involving camera placement and the story. I am a bit worried we don’t have managed to tell our story good enough, but I hope. We worked so much on it, although not everything did go as we planned, we delivered an awesome movie.
We did not see it at the start, but it was really too much for a group of 4 unpolished artists. We were so close getting it all perfect, but we missed out on some things. But even though we did that, our movie is good. Of course we wanted to do something different. But nothing of that matters now, we are done. Finished.
I have learned so much the last 18 weeks. So much that I do not know where to start. Not just programs, and how to make a 3d short, but also how to act in a group, how to talk and treat different persons so they can perform their best. I have evolved as an artist so many ways. My eyes are looking at things in a different way, an artistic way.
What I feel I need to work on, is my animation skills. Even though I don’t not want to do work as an animator, I want to be able to do it. A job can be a combination of many things, so want to make sure that I am not getting thrown away because I can’t animate. Not that I think I can’t animate, but I know that I need to work on my workflow, and get better at it.
This project has had its ups and downs. The best is maybe the post-production when you see how awesome it looks, and you know the end is near. Another good thing to take with me, are all the positive response on my blog. It’s not just from the teacher, but also from my fellow students. This really pushes be to make it better, and keep writing through the summer, and keeping my fingers warm.
So that’s it. 18 weeks is gone, and a movie is born. Enjoy it, and please to contact if you wonder about something. Have a nice summer!
We are now in the last days of this project. I am stressed out and really tired at the moment, average time of 12 hours each day at school this week. So my life is basically just school and with almost 3 hours of travelling time, I just work with this project and sleep. But it is necessary to get this awesome movie done!
As I said, I am really tired, and my body just wants to sleep. But at school with my group, I try not to show how frustrated I get, I try not to complain a lot, and I do work my best all the time. This project has been an eye-opener on how much other people can affect each other. If one does not work properly, all of us fall down to his or hers level. Or if one get frustrated, all of us get it. This is exactly what happened last day, a group member was coming in and all he did was complaining and being frustrated. This does something to the whole group. No offense, but if people should be like that, stay in bed a couple more hours instead of doing outside school stuff all night long when you are in the last days at the project. You are always responsible for working when you are in a group project. If one fails, all fail.
So, that’s was a harsh start of this post, but now I will write a bit about the Post Production pipeline for our group.
I don’t think I have mentioned it, but we are rendering with a lot of passes and saving in an exr format.This means that we can get out every pass we have rendered from that file. I was really skeptical of using this, because we needed to use Nuke. A program only Mats has used a lot before, and then again we are so dependant of mats doing almost all of the Post Production, when it comes to color correction and such. And I would then bring it in to After Effects or Premier Pro to get transitions right. I did not think that this workflow would be efficient, and our result would be the same if we rendered in standard tga and brought into After Effects.
And I was wrong. When we have the passes, we got a so powerful tool when it comes to masking out and correcting only certain areas of an image. But, Mats is the only guy knowing this program, but he has been brilliant throughout the first days of Post Production. He gets a lot of questions thrown at him, and he needs to get up and help us a lot. But he takes it with a smile, and helps out and explaining. Credit to Mats!
But is the result good enough when it comes to time used at this process? The result really speaks for itself.
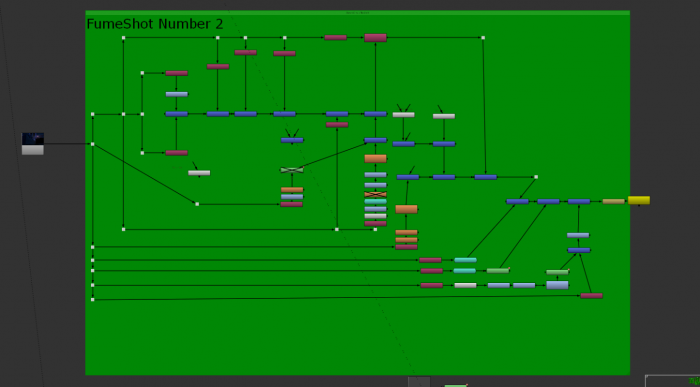
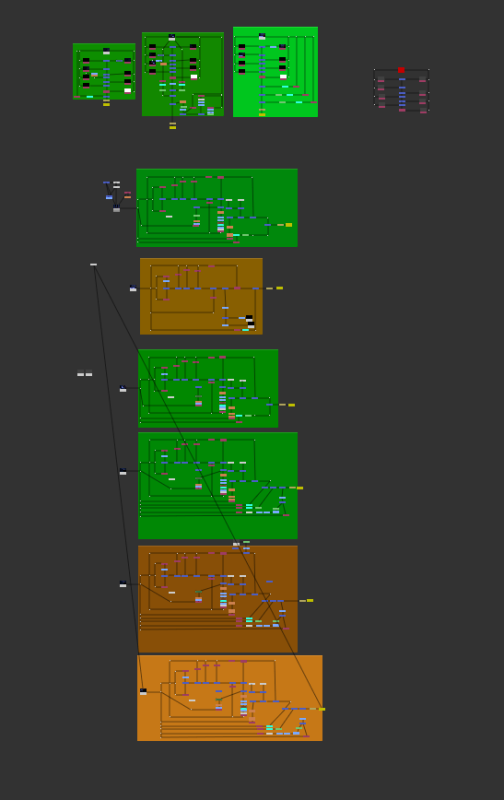
And Nuke got this brilliant node system. When you first have made a node-system that corrects your image well, you can just load up another picture and you get the same color correction there, loads its passes and it is easy to make changes.
BUT! I can see a danger with this. Now that we have seen what we can do, it’s dangerous to be stuck in this program looking for awesomeness and then trying to make our frames excellent and flawless. This program got some rendering time, and this can be our biggest falling pit ever. But I am aware, and trying to make the others aware to. Will we succeed? On the 15th of June we will know.
That’s it, a small post about some final thoughts and that we might need a little miracle to finish this. We might just get that.
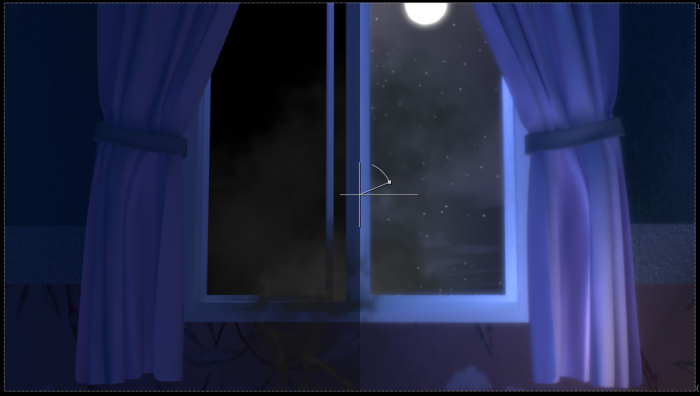
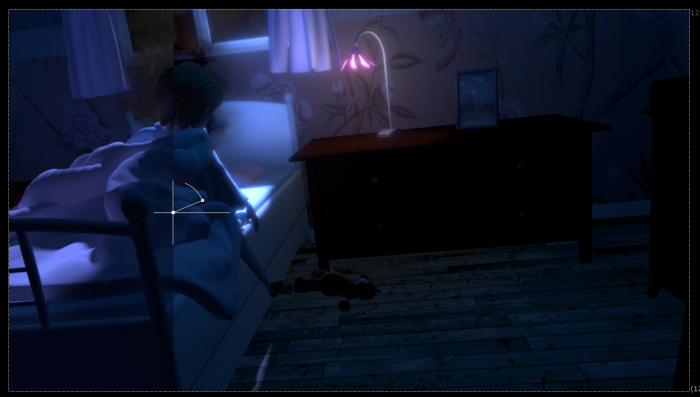
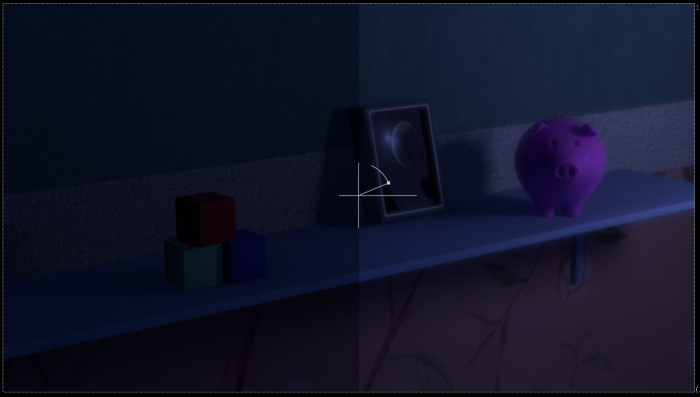
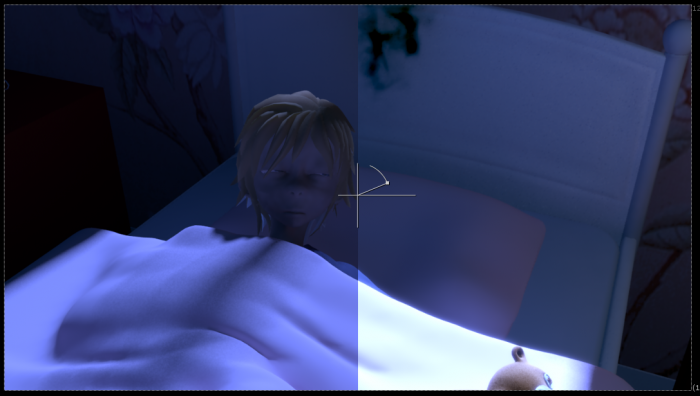
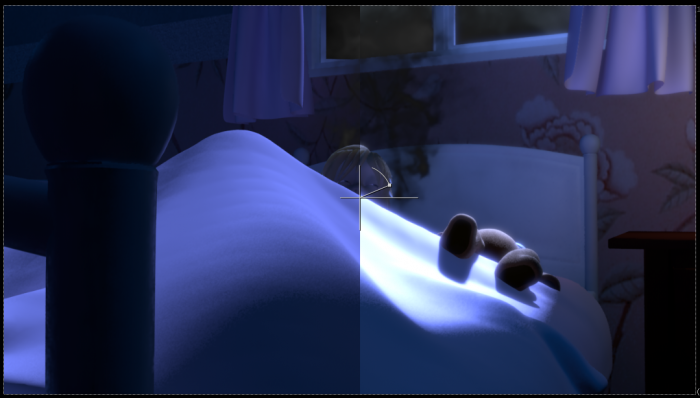
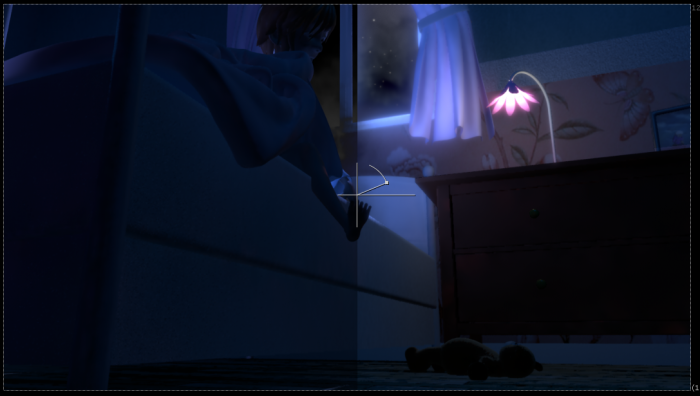
A bit of an update now: Since I wrote this post, I have been setting up some others shots, and o’boy I am having fun! I wish I could work with Post Production Rest of my life! Some new screens under here:
As I mention before, we wanted to promote our movie. Just to create some buzz, and make people wait for something good, and make them interested.
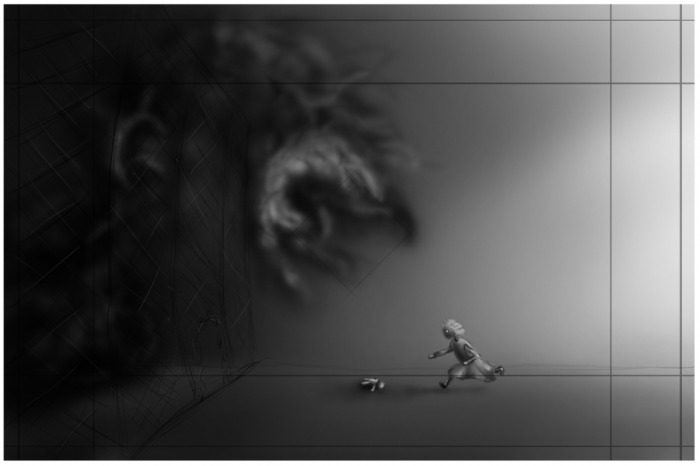
It really started in some of the early weeks of the project when we was drawing the storyboard and put together the animatic. We said that it would have been awesome to put up posters and make people come watch our movie. We had a nice little chat about it, and said that the scene where the smoke is coming up behind the girl would make an awesome movie poster. But as this was so early in the process, we left it with that.
When the animatic was done, our teacher wanted us to post it up on the wall of the official 3d Animated 3d Short Film Production Group at facebook (http://www.facebook.com/#!/group.php?gid=390718338616). Already then, we discussed on what to write to get people to comment it and make sure they watch it.
So we when we started to get into the movie, and started to come up with some renders, we decided that we wanted to make WIP post at a Norwegian 3d forum, www.3dhue.com. We wanted to this for 2 reasons; one was that we wanted critique and comments on work, so we could improve certain areas of our movie, and the second reason was that we want people to know that we are making something awesome.
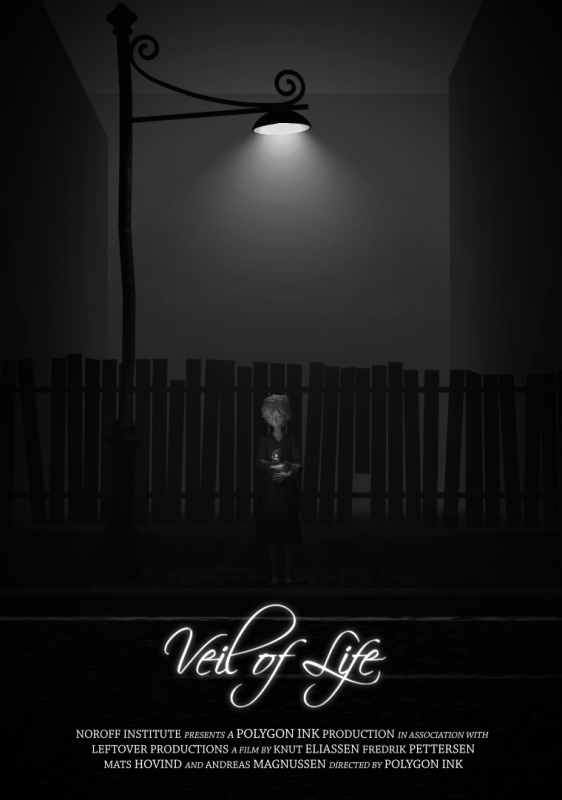
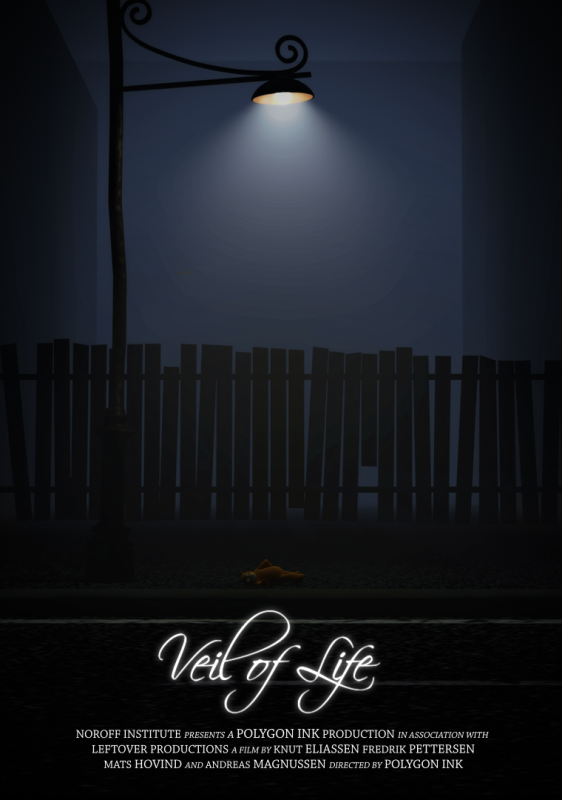
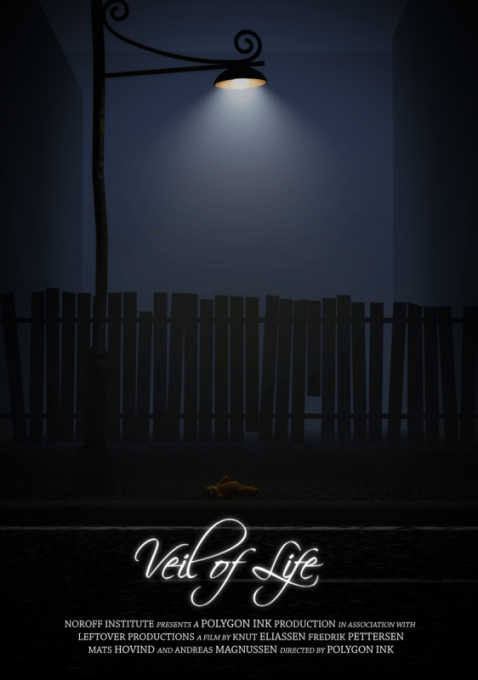
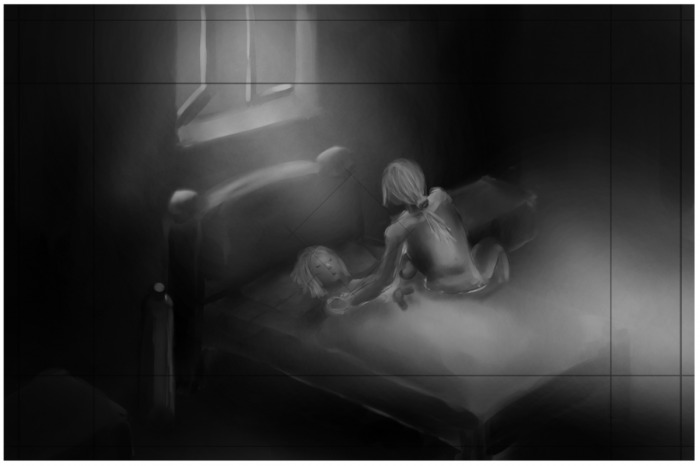
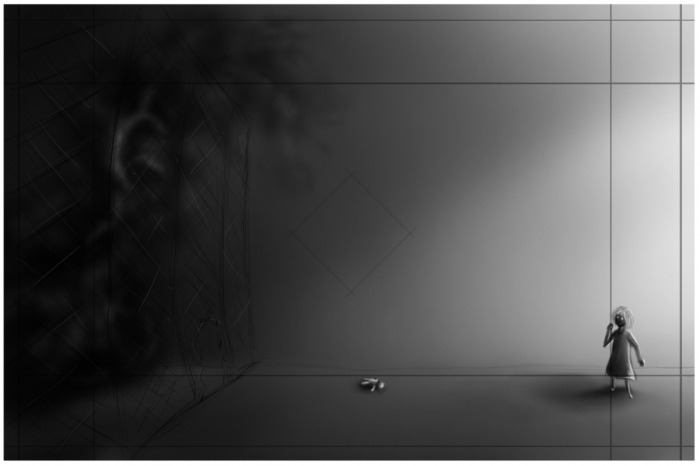
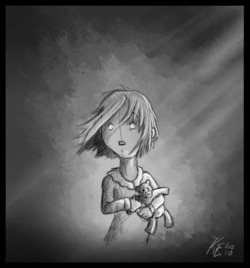
This is where the movie poster comes into the picture. With the post, we wanted to make a movie poster that could catch people’s eyes, but not reveal the story. We want them to want more and more. Although we hadn’t made the smoke for the scene yet, we still wanted the scene where she is standing under the light. It’s a scene that tells a lot about the style and the story.
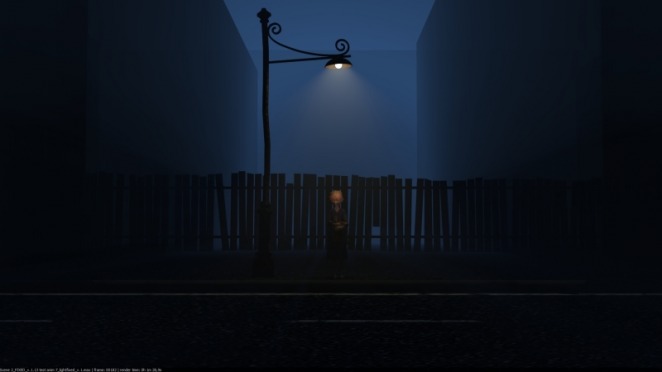
I rendered out a frame from the scene. I picked a pose where she looks down, and looks very sad. Like she is lost. I thought that described our story good and gave out a mystic vibe.
Raw Render
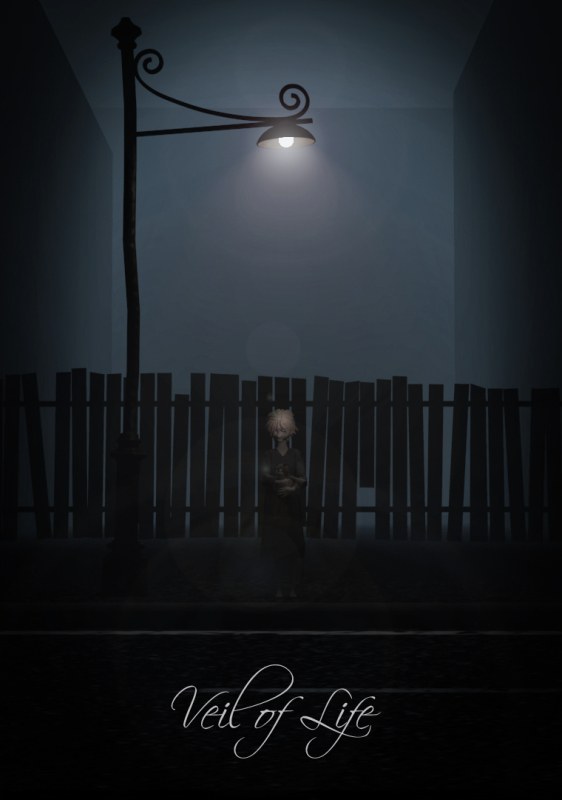
At this moment, we hadn’t decided the name. So I went into photoshop and took one with each of the remaining choices we had. I hoped that this would help us chose the name. Of course I did some color corrections at the rendered image. That’s the fun part.
Here is what I ended up with as first drafts.
I posted them at our production forum, and got some feedback from our teacher. He wanted me to change some small things. I love to get critique and advice from people that have worked in the business for a long time, but I am not always going to follow them. I have to trust my instinct sometimes.
Here is what he wanted me to change:
The Font. He meant that this could be hard to animate if we wanted so. I thought that this font was perfect for our type of movie. It’s nice looking, clear, and as something elegant over itself. A big contrast from our movie. And if we want to animate it, I can manage that. So I decided that this would not be changed.
Too Centered. He meant that the composition was too centered. I feel that a poster should be centered. My opinion is that it looks weird if something is offset. I did a small test just to see how it looked, and I was not that happy. I tried to imagine if the text was put at the side of the girl, could have looked ok, but nothing more than that. So this would not be change either.
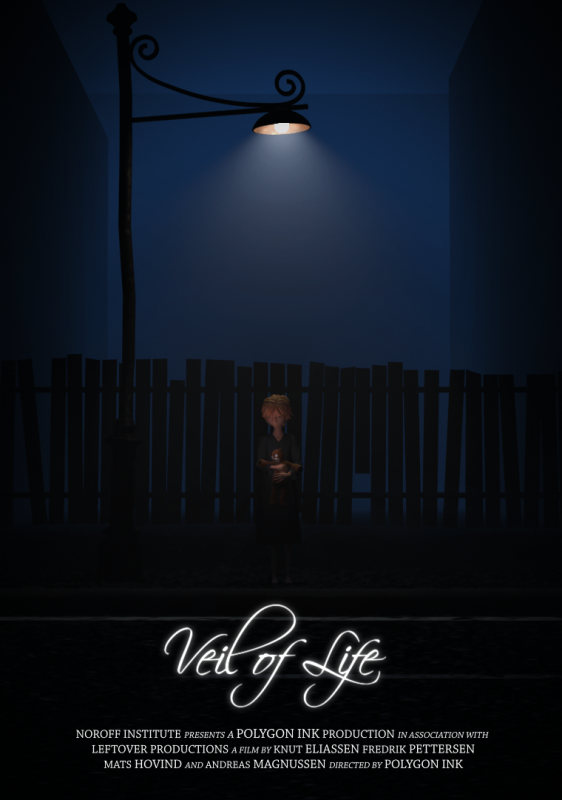
Bottom Text: He wanted me to have a text at the bottom that is at the professional movie posters. And I totally agree, it would take the poster up a notch, and look better.
Too far away: He meant that the girl was to large away and we could not see all of the details. I agree at that point, but that was some of the plan behind this. I want it to be a bit mystic, and that something should be blurry and unclear. Let them guess a bit.
The flare: He wants me to remove it. I agree. It was a last minute effect that I threw on there. Although it looks cool, it doesn’t fit into that setting.
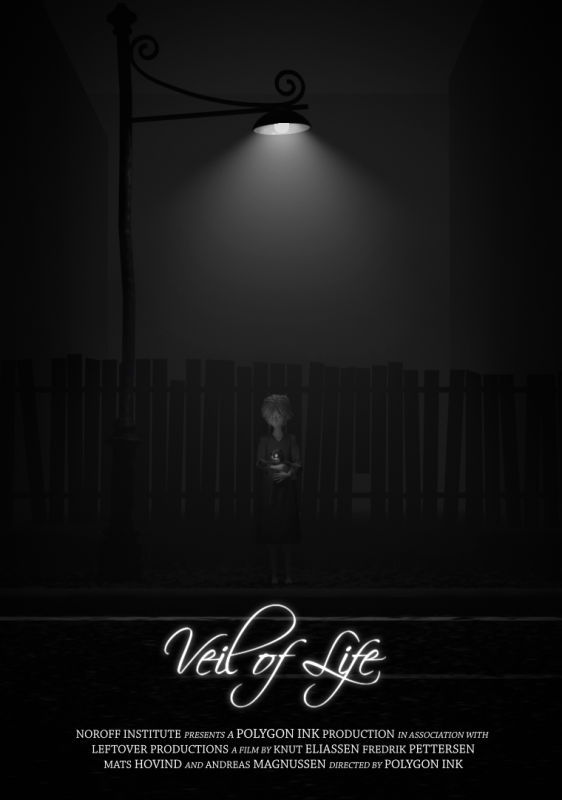
So I went back and started editing one more time. I tried some different styles.
Personally I like the one with the most colors. But that’s because I like lights and colors. A bit more de-saturated version would be better for our purpose I think. When it comes to the black and white’ish, I think it got a bit boring. The eye would just glance over it, not stop and look at it.
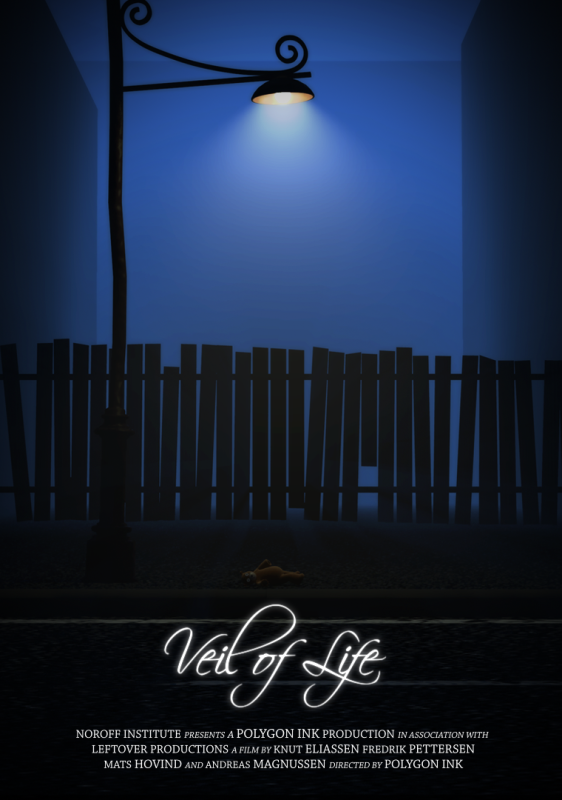
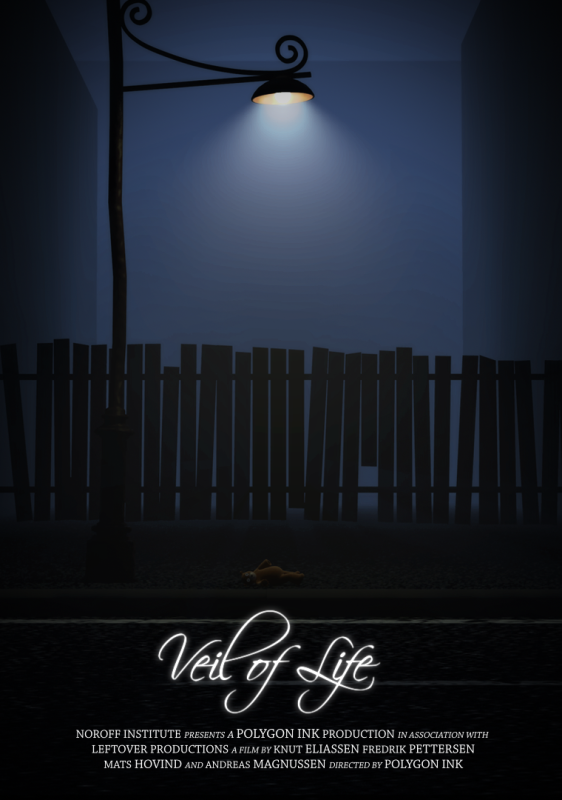
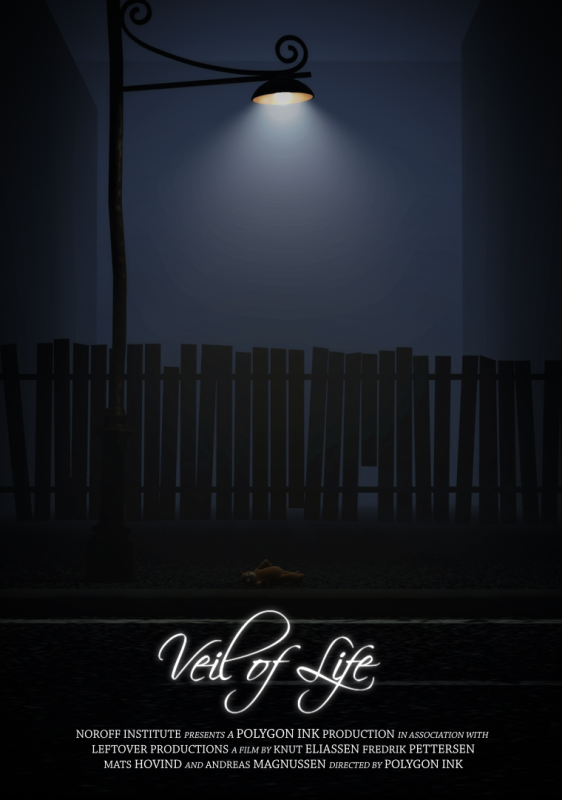
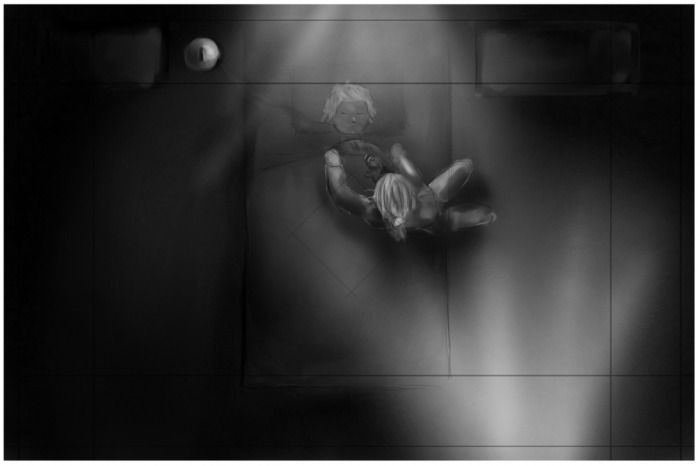
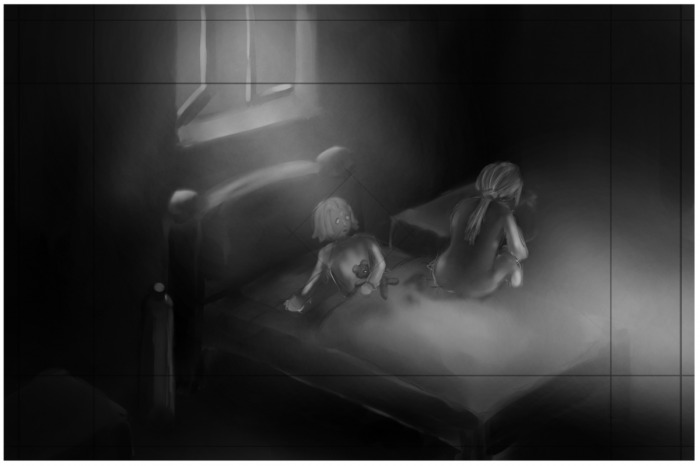
I still felt that something was missing, and I just couldn’t put my finger on it. Then I got the famous light bulb over my head and came up with an idea. What if I removed the girl, and let the teddy bear be the centered of attention. That would be really creepy. Many questions could pop up in people’s minds.
Once again I rendered out a frame, this time I had to animate the teddy bear into position. I rendered the frame so big that I could try out different sizes for my final comp.
I made a couple tests, and found out what size I wanted, and then I started the editing process again. I had to make the teddy bear a bit more visible, so I lighted it up by copy some layers and change the layer blending mode. This is what I ended up with.
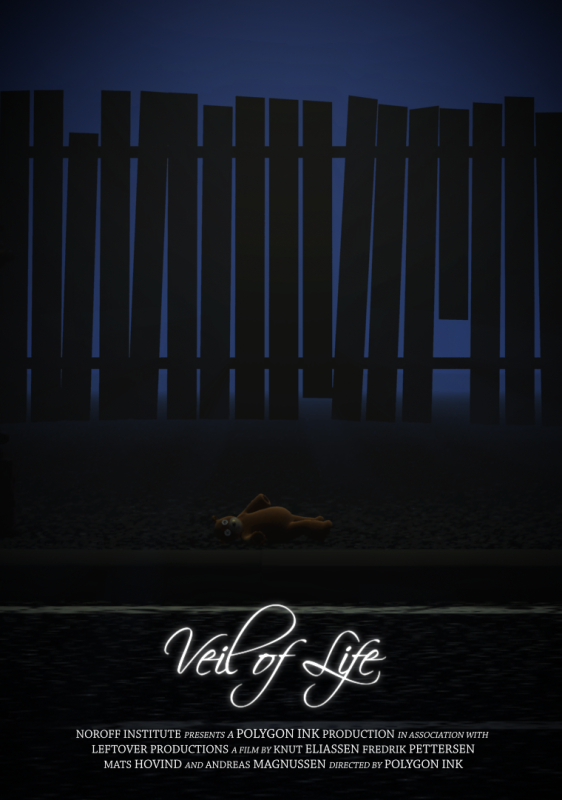
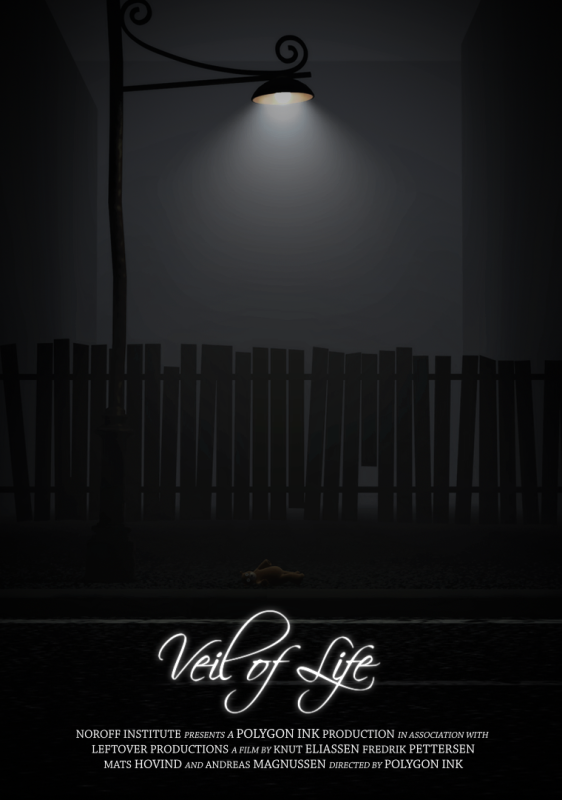
And the one we chose was this one:
I am really happy with the result. If no one had ever heard of our plot or seen anything else from it, I think that they would get really interested just because of the teddy bear lying there. The blue volume light gives a really creepy feeling that just is perfect for our movie.
If I was going to make some changes, I think I might have put the Title somewhere else. Possible at the top. I think that it is a bit much at the bottom.
To sum this chapter up, I want to write something about me as an artist. Because as these weeks has past, I have discovered new things about what I like, and what that is driving me against a finished animation, poster or image for that sake.
I have become more and more aware of that I really like things to be clean. I don’t love all that knickknack that can be thrown on some images. The colors also need to blend into each other, or have a big contrast. You need to think colors all the time in other words.And that’s why I think I am so fascinated by movie posters or advertisement. They are often clean, and really neat to look at.
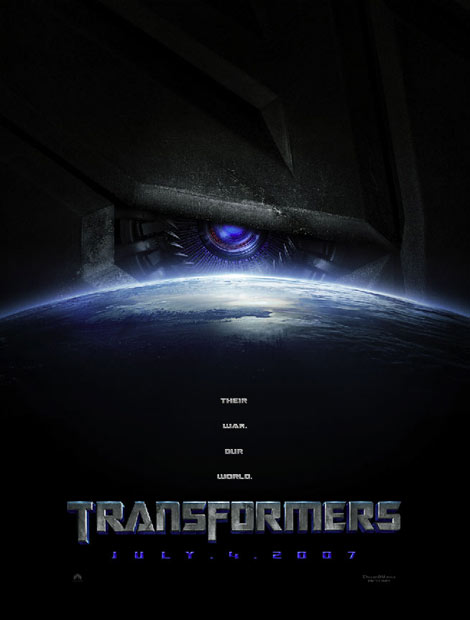
Let’s take some movie posters.
These two are a good example from what I like. So clean and just beautiful put together.
Beauty and beast poster is a work of a genius. It so amazing how they have they have composite this together. The blue outer ring has huge contrast to the red middle ring, and inside there again, you got the yellow glow that is the light hitting them. All of this is guiding your eyes right at the two characters, and you can clearly see what they are feeling for each other.
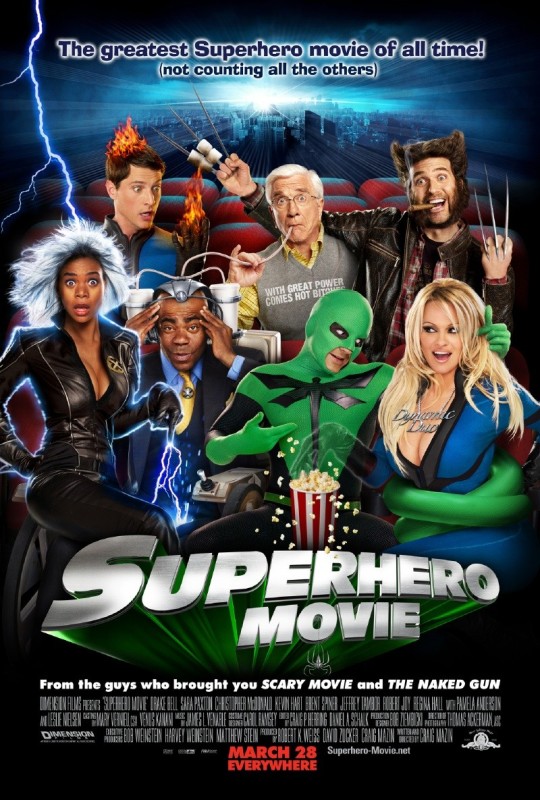
The next two examples are example of what I do not like. Too much happening in the picture, you don’t know where to look.
Discovering these things lets me be more aware of what mistakes I can make. Because when I first love clean compositions, I can start doing it all the time. So I need to be able to find out when I need to do what so I don’t start doing only clean compositions.
We in Polygon Ink wanted of course to promote our movie a bit. Let people out there know that they should pay attention to this movie and wait for it. Make them interested in what we are making. After trying to promote our film and doing some marketing for our movie, I got really interested in the whole idea of marketing. So here comes a post of my thoughts around how to market a movie, and some different methods to get people interested in exactly what you are doing.
The movie business used tons of money to promote their release. The most common thing they all do is to make a trailer. For some years back, the trailer where only shown in the cinemas and at the TV. That means that they had to buy advertisement place and use some money at it. But we are now in a whole new generation. The internet generation. So now, they can just make a website and put their trailer up there.
When sites like youtube and vimeo was online, things got really easy for people who want to promote a movie. Every trailer is being snapped up and put on youtube or sites like this, or they just simply put it up by themselves.
For example at youtube, the trailer for Twilight: New Moon got incredible 32 millions views. You know some of them will go pay and watch the whole move. At this moment, they got a $709,711,008 in gross revenue (http://en.wikipedia.org/wiki/Twilight_new_moon). So they have done something right.
So a good trailer is important. I think a trailer needs to tell some of the story, but not revealing how it will end. Just show that much that people will stay curious and really want more. When people want to watch the tailer over and over again, you got a really successful trailer.
I really like the Ironman 2 trailer. I have watched it many times, and think that this is an awesome trailer. Why? First of all, its starts with some humor, and some cheesy lines.That’s one way of getting my attention. And then you get a brief hearing of a soundtrack you know you have heard before. Then it swaps over to a character you start wondering about who is, and what he is doing. So now you start to see where the story is going. Then the soundtrack is turned back on and you get see small parts of the movie, action shots, hot babes, awesome effects and famous actors. Its perfect put together and really makes me want to watch the movie again and again.
And I was not disappointed when I saw the movie, it was exactly as I thought it would be, and a bit more. But it is not always the trailer is that honest with you. If a movie is not that good, you can always get people to come see it by making a good trailer. Take for an example GI Joe. The trailer got much of the same as the Iron man, nice effects, good editing and awesome action, but the movie itself was a letdown.
The soundtrack is also very important. If you get a really good soundtrack from a popular band or artist, you will get a big load of free marketing. A deal between the production company for the movie and the artist/band that says that the music video should contain parts from the movie can be a golden mine for both of the parts. If the song gets popular enough, you get parts from the movie shown at all of the big music TV stations like MTV or VH1. That’s awesome promotion for the movie.
At youtube, Linkin Parks “New Divided” got about 47 millions views. It was used as a soundtrack for Transformers: Revenge of the Fallen.
Or you can take Paramores “Decode”, which was Twilights soundtrack. It got 17 millions views.
I mentioned that the internet can be used to promote movies, Blair Witch Project did exactly that back in 1999. The movie is filmed in a hand held camera, so its looks real. They just release some shots from it, and the buzz hit the roof. Some thought it was real and just had to see the movie. A really creative way to do things.
A much more recent movie, called Paranormal Activity did something similar. A movie that also is filmed with a handheld camera, and gives the impression of being real. This is a low budget movie ($11 000), and was seen at many festivals. It ended up in the hands of Steven Spielberg. And a legend was created. It was said that Stevens’s bathroom door suddenly opened itself while he had the movie. The film was haunted. True or not, a little story like that creates buzz.
The published a website where you had to vote to get the movie to the cinemas. It had to reach 1 million before they would release it.http://www.paranormalmovie.com/theaters.php
This is some of the ways the big movies do it, but if you don’t have the money, you should think creative. Let your fantasy go wild.
When it comes to promoting a student short, you are at a whole new level of things. You don’t have money at all. I have seen trailers for student shorts, but often the student movies are so short in length that you have a hard time to get a good trailer.
We chose to make “Work In Progress” post at 3dhue.com. A Norwegian 3d forum. Here we posted some concept and renders. Things like this will make people interested and we get feedback. I made movie poster too, so it looked a bit professional. That’s important, things that look professional will be taken appreciated much more than something that is messy.
I will end this post now, and make a whole new post about the movie poster and my thoughts around it.
Don’t know where to start, other than that we messed this up good. Not that I think that the final character doesn’t look good, in fact I think it looks really well when you consider the time spent on it, but this was done as a last minute job. Things should never be done that way where you feel that you need to hurry. I have pushed myself to the limits when I was working on this one. I have to write this down, so this won’t happen again. I need to reflect around this, and see where it all went wrong and why.
When the pieces of the story fell together, we saw that we needed the mum of the little girl in the end sequence to show that she comes to life, and the smoke was the symbol of the mum trying to get her to back to life. Reading this, I feel that the mum has a big part of the story. She is important, and should had been take more care of, and maybe given a bigger role at the end.
I wrote that she is important; this is something I just realized. And it’s too late. At the start we said that this character was not taking a big role in our movie, and will not be shown much. We were trying to put cameras so we would hide her face and she would only sit on the end of the bed so we didn’t have to animate her that much. All of this was our first mistake.
And the worst thing about this is that I think that we were warned about it. Not directly aiming at what I wrote over here, but when we showed the animatic in the classroom, someone mentioned that the camera angles at the end should be thought through one more time. Its first now that I can see that this I probably because the mum is being hidden from the audience. So it gets a bit weird.
And the second mistake is that we did not divide up our schedule good enough. It was too unclear when it comes to what that should be done. We put up “Character modeling”, when it really should been divided up in “The girl” and “the mum”. But that we didn’t do, and then we get as we deserve. We forgot the whole model, because we were so eager to get the animation going. Things like this shouldn’t happen at all.
So when we came to week 12, and we had only 5 weeks left, we saw that we missed a character. Everybody kind of watched on each other, and didn’t do anything about it. We were trying to come up with an easy solution. We asked one of the other students of the school if we could use his girl model and just remake it a bit. He said yes, but none of us did actually go get it. Weeks went fast, and suddenly we needed that model. And the person we were supposed to lend the model from was not at school. We get what we deserve once again.
So, two and a half weeks to deadline, and I decided to get things done. I am sure, and I know that others of the group could have done this for a long time ago when some of us were drawing storyboard for an example. But it all comes down to taking initiative. And I am now. It’s a bit frustrating, but all of us are guilty in failing as bad as we did.
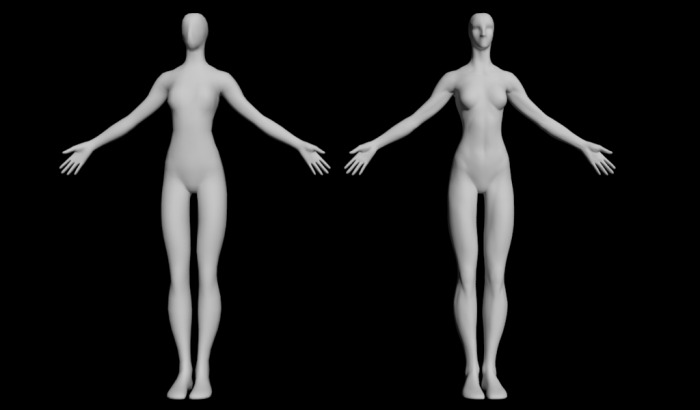
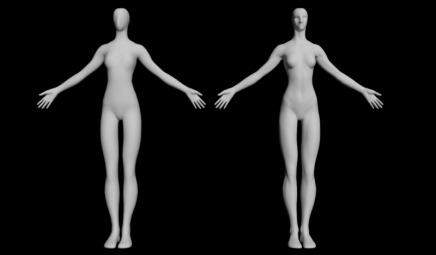
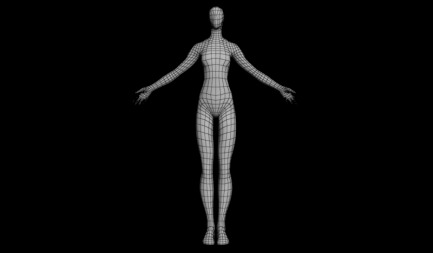
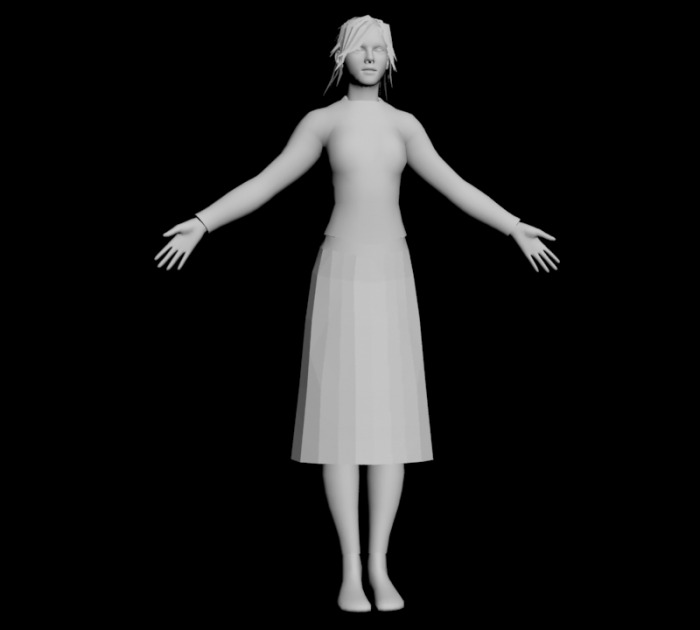
Since I did not have time to model a whole model, I went to a classmate (Alexander Edvard Fusdahl) I knew that had a female test model he made for test renders. And because he is a floater, helping many others groups, I felt that this was ok. I’d like to do all of it myself, but we are in a hurry now. I got a high poly model, and a low poly. 300k polygons were too much. No way am I going to skin that. The low poly was about 10k I think. I went for that one.
Model by Alexander Edvard Fusdahl
Model by Alexander Edvard Fusdahl
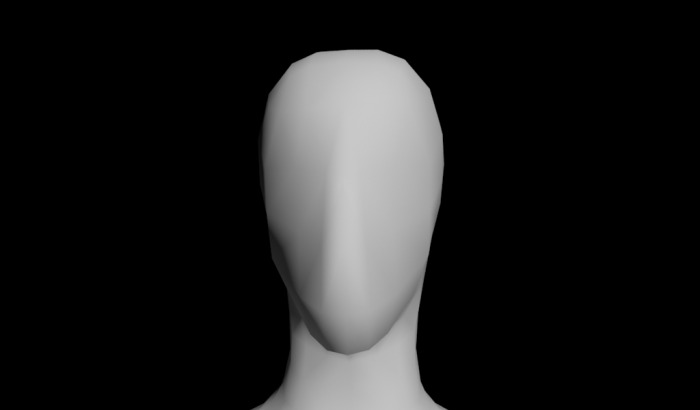
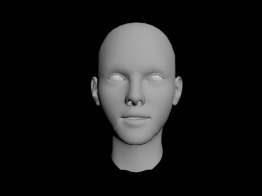
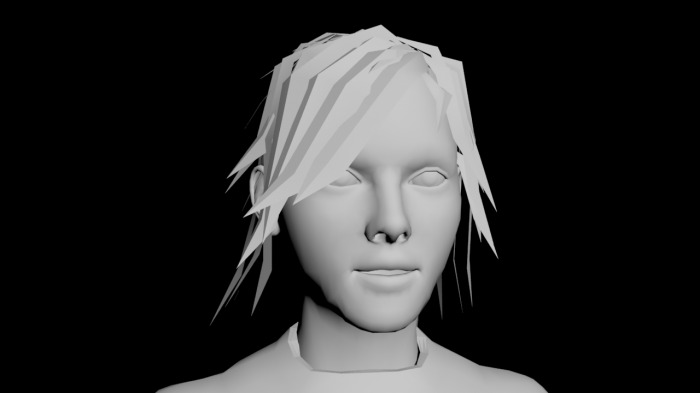
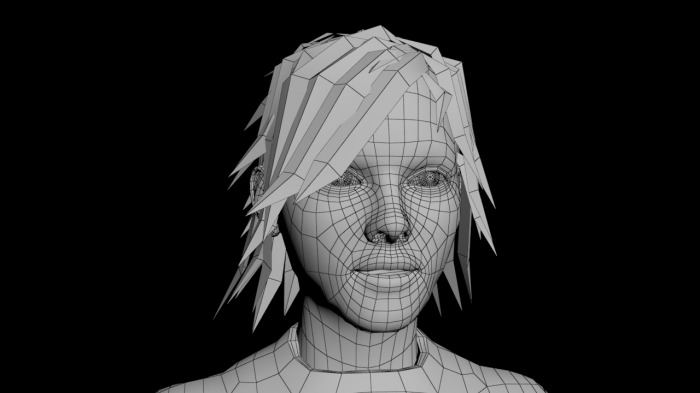
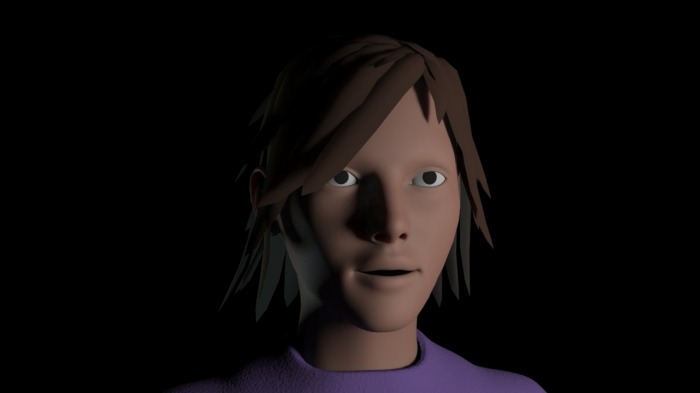
The first thing I noticed with the model was that the face was too low poly. But as I have mentioned, we are going to hide this as good as we can. So I thought I could just do some simple modeling, and it would be okey. WRONG. When it comes to modeling realistic faces, or faces in generally, I need to study that. And the hair I was working on, did not look good either, nor did the clothing I tried to get on her. Things needed to be done, so I aired by brain by watching a football game, and just relax.
This is how things end when you rush through it.
Nothing is like watching an intense match and getting some good fresh air too. My head was cleared, I was working again and before I knew it I was on my way against a finished model.
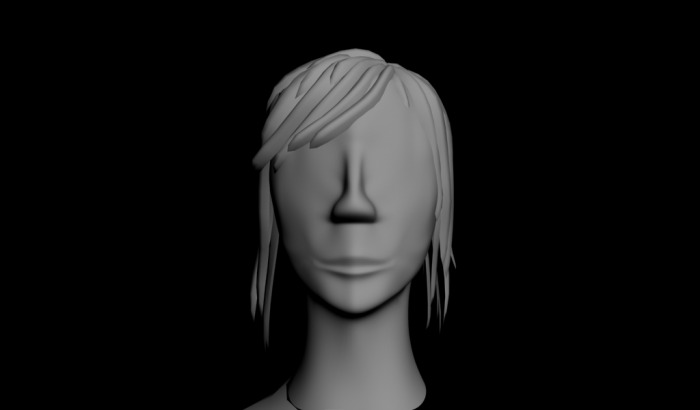
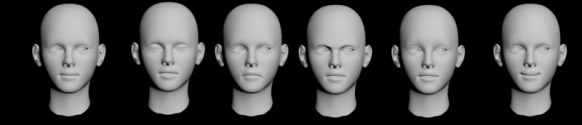
I found a head on of my many discs form 3d world magazine, and deleted the old head. One of the many reason we are going to hide her face, is that she would have no facial rig, and therefore could not show any emotion. I wanted to give her a bit of life, so I made some morph targets. This was really easy and a fast way to get some life into her. A method I would use later in my career for sure.
Head from ir-models
Morphtargets
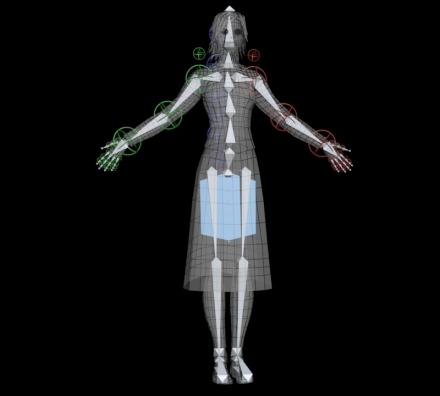
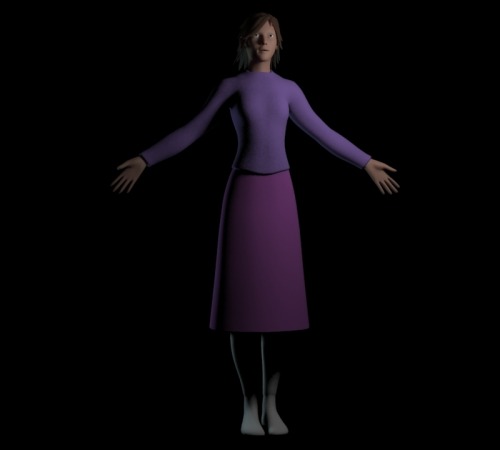
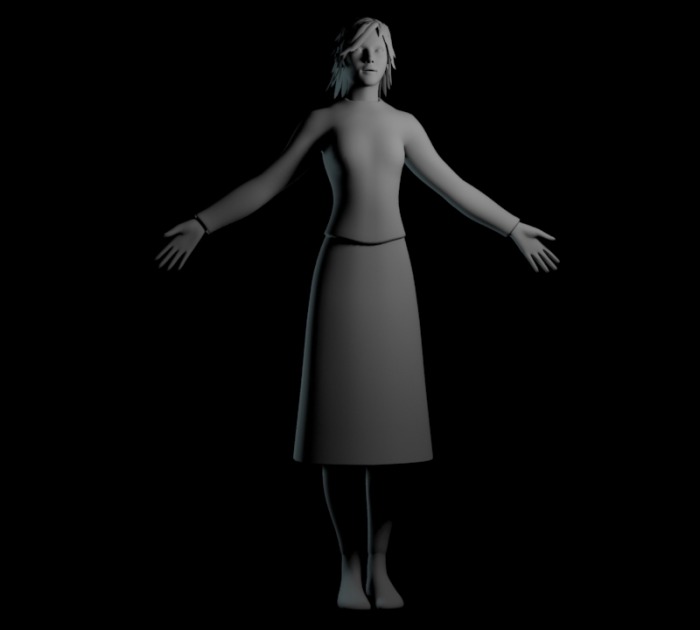
When I talked to the others at school, we wanted just to push her mesh out a bit and make a sweater and some pants. My first reaction was that that can work, but its night and she really should wear a nightgown. But we wouldn’t go through the simulation of more cloth. So I tried the pants and the sweater. Sweater looked good, but the pants looked more like tights. Was she out running?
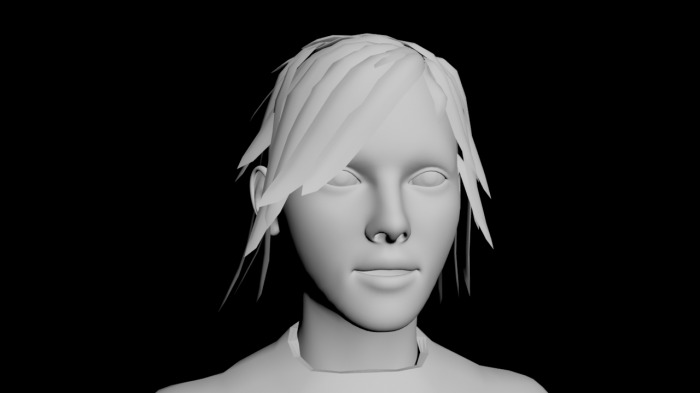
So I made a skirt on her. Now she looks more like a mum and I am really happy with the look. I moved on to the hair. I took some time to place out all of the polygons, but I was worth it. I think that she should have gotten some longer hairs in the neck to give her a more of the mum look. But she got a more of a trendy mum look.
Suddenly the clock turned half past three, and I really needed to go to bed. I knew that I had a long day of rigging and skinning the next day. I was really happy about what I achieved that day.
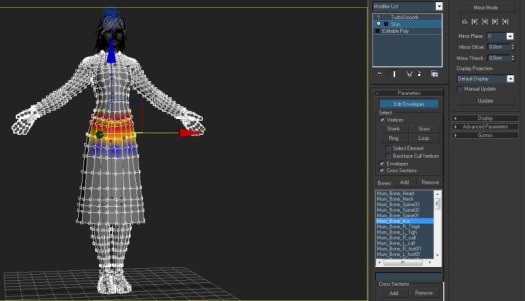
I woke up at 10, and got myself some breakfast before I sat down creating a rig. Since I have already rigged a character this project, I feel that thing went much faster than the first time. This rig is a much simpler tough and I didn’t have any big problems with it. I am sure that I could have used more time on it, and done it a bit better, but it should work fine for the small amount of time she is in the movie.
When I skinned the teddy bear, I said to myself. Never again. But the mum model needed to be skinned as well, so I needed to suck it up and do it. I felt that this also did go much faster than last time I when I skinned the teddy. When I left the model for the day, it was almost done skinned, only missed the neck and some spine problems. I went to bed, not so frightened about skinning. It’s really just time consuming.
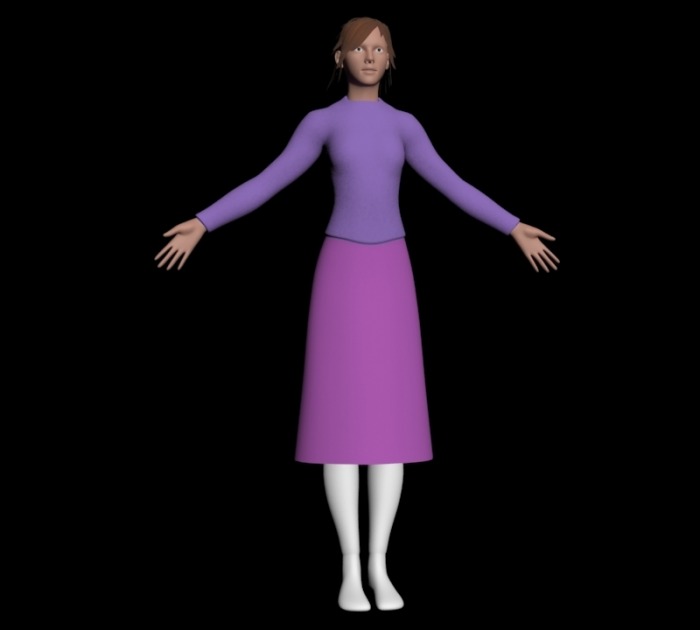
I met up at school the next day, and was eager to show my group mates the result I had achieved. It kind of looked like they didn’t care. No critique or praise. So I just finished the skinning, and went ahead and textured it. The colors where simple and something that would blend into the room. For the skin and hear, I used the shader that Knut created for the little girl, just changed the color.
Since Fredrik is the one who shall animate the mum, it was a big advantage that I could sit beside him when I handed the rig over to him. It was some small things that I had missed, that could be fixed immediately. We also come over a major problem with the shoulders, so it had to be fixed. I didn’t really know how and why it happened, so I went around asking. This day, people were not so found of helping out, except Alexander Edvard Fusdahl who helped me with some other problems. But at that moment when we discovered the problem with the shoulders, he was not in our classroom. So I sat down and tried to think like a rigger, and found a solution to the problem. Seems like I am learning a lot of rigging and starts to really see how thing should sat up.
So after working intense in about 2 and half day, the mum was finished. I think that I did a good job on this, all though everything are not done by me. But I have showed that I can find easy solutions to problems that could ruined our project.
I have learned a lot from this. Do things when it should be done, never delay things. You can never sit down and think that other should do the work, even though they should. It’s always yourself you can trust, because you are never sure that others will completely the work. On the bright side, I have discovered that rigging and skinning don’t are so difficult as long as you just sits down and do it. It just takes a good portion of time, and can be a bit hard sometimes.
That’s all to say about this character, and hopefully I and my group mates have learned a lot from it.
This post was meant to be one post, and I know I have said that I wouldn’t divide my posts up into smaller parts. But I am going to do that now. Not because I am doing it to make sure I get my 17 posts, but because it will get much more clear and tidy for the reader out there and the post had been extreme long if I did not divide it up. And every part of this post fills my own standards of a good post so I do not feel that this will be a problem.
I have divided it up into 3 parts and each part has a ending where I try to explain and reflect on what I have learned from those things that have been written about. Part 1 is about why we brought this teddy into the story, and about collecting the references. Modeling and Texturing will be in Part 2, while rigging will be in Part 3.
PART 1.
Why a companion?
We haven’t really discussed this very clearly in our group, just some lose thoughts around it, but I want to share what I was focusing on when we chose to bring in another character into the story. Because it is loads of benefits when we bring in another character into the stage. You get a whole new element that can change the story, and give the story better turning points.
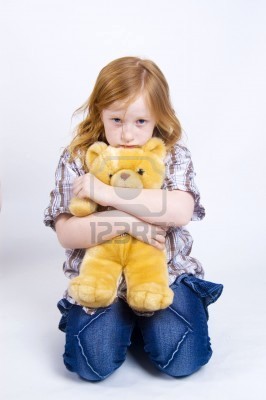
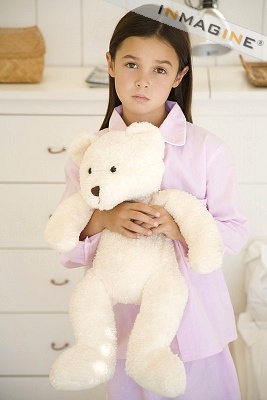
First, why a teddy bear? This is maybe the easiest question. By making the companion a teddy bear, we make the girl much cuter. She gets much more character of having a little teddy bear at her arm. And it does make the story a bit more believable. Every kid at some stage in their life is very addicted of having a toy or a teddy bear with them all the time.
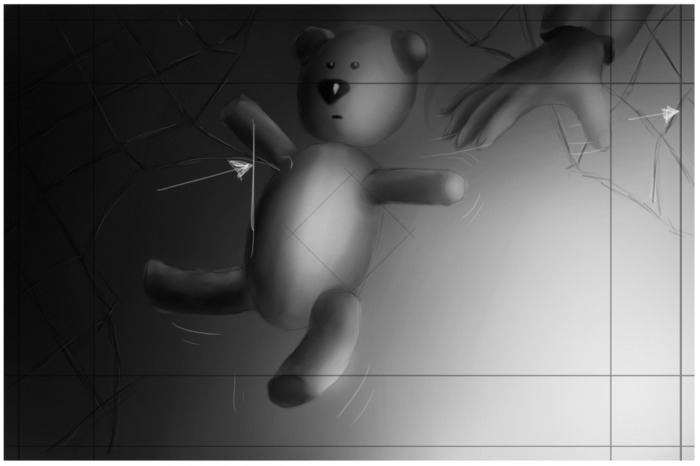
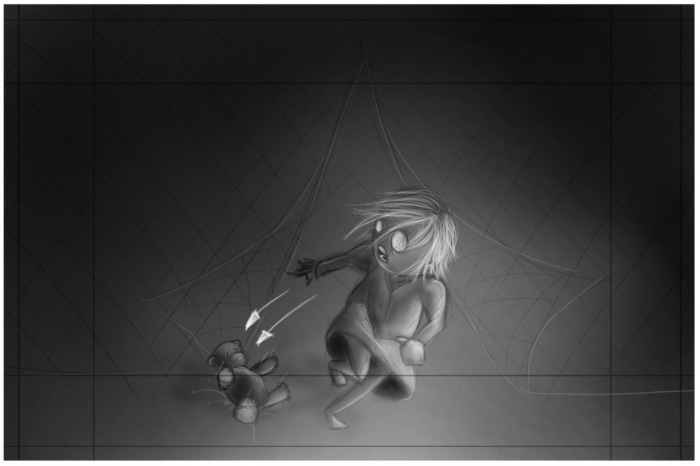
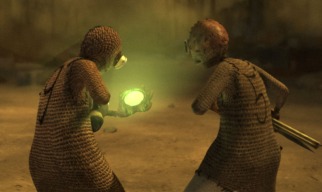
She can hold her teddy tight when she is scared. We can have her show more emotion with the teddy, than we could without. And when she runs with the teddy bear, it will swing back and forth so we get a dramatic feel.
The biggest reason of let the girl have a companion in the story was that we felt that the story was not strong enough. It needed a dramatic situation. We needed a reason for her to stop up and confront the smoke monster that is following her. When she loses the teddy, she needs to go back and pick it up. We get a whole new element of excitement in the movie.
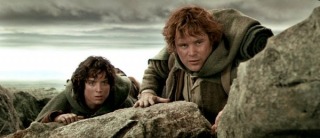
Many movies lets the main person get a companion that are being used throughout the movie to tell the story better, and bring in scenes that you couldn’t have without them. If you take Lord of the rings for example, you can see how they used Sam. Frodo get a traveler companion that make’s Frodo have to go back and help Sam out and opposite. The friendship between Frodo and Sam grows throughout the story, but later on they are being split up by Golum, but Sam still go back to help Frodo when he is taken by the orcs. It’s nice to see how different movies use persons to tell the story better, and think I can learn a lot from that when I am going to make a new movie sometime in the future.
References.
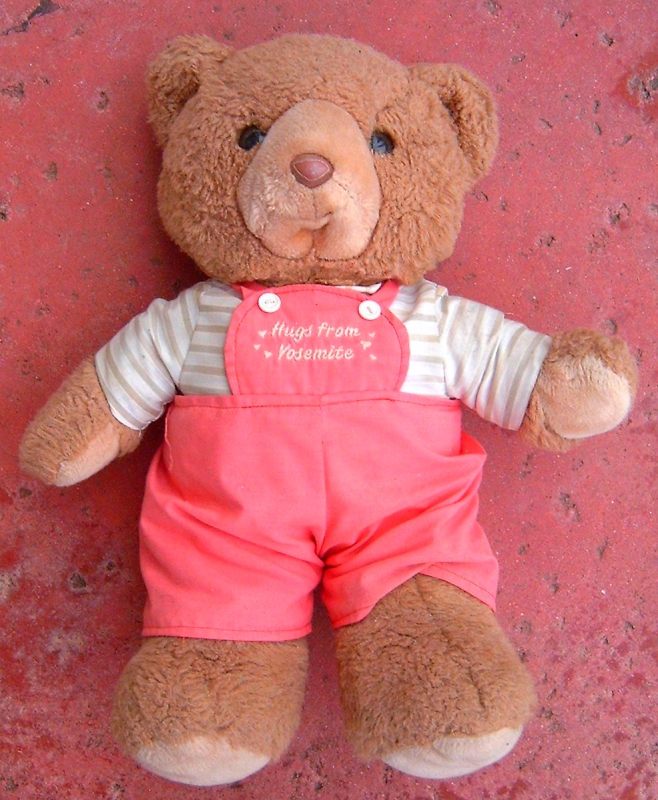
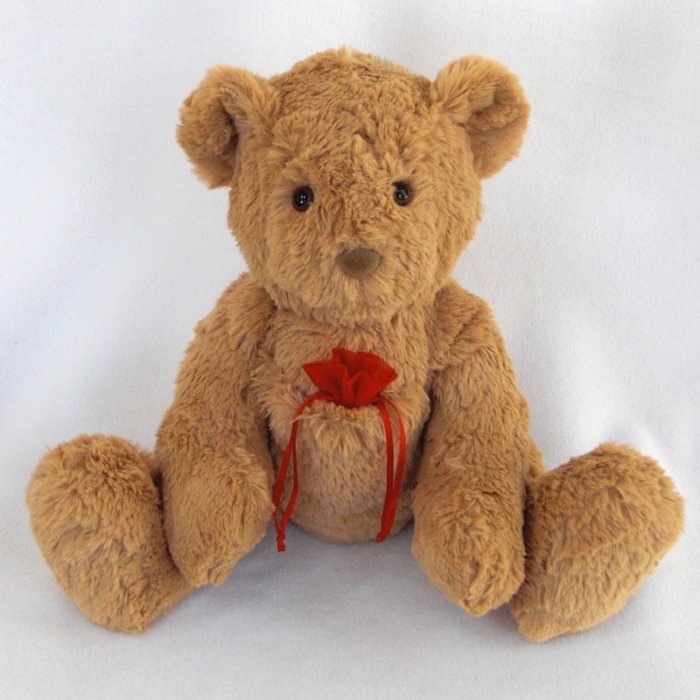
We started with searching after references all over the internet. It was loads of pictures there, so it got our brains working. Who knew it were so many different types of teddy’s out there? These are some of the pictures we found in the start:
These didn’t quite strike our hearts to say it like that. Too find out what type of teddy we wanted, we needed to know how the teddy was supposed to be treated, and what it should be doing in our movie. His owner runs a lot, so we wanted him to have a slim body, with thin arms and legs. So his limbs could be thrown around a bit to get that dramatic effect.
As you can see from some of the first concept for the movie, Knut had already thought in that direction. To get some measurements, I took a look at some of the teddy bears that my mum has bought throughout many years. We found out that about 40 centimeters would be a nice length for the teddy.
We didn’t really need a name for this character, but we kind of started talking a bit about it, and Fredrik come up with Herman. From there it weren’t a long way to “Herman the Teddy Bear”. So now it had a name too.
Experience:
I didn’t feel that I really learned a lot from the collecting references part. It’s basically the same as I have done loads of times before. The one thing I learn, was that I should look around in the house for real references before I go onto the internet. Better to have them in my hand than on the computer.
The most interesting thing about this part is that I look at characters in movies in a bit different way. I try to see how they are being affected by the others around them, and try to think how it would have been without them.
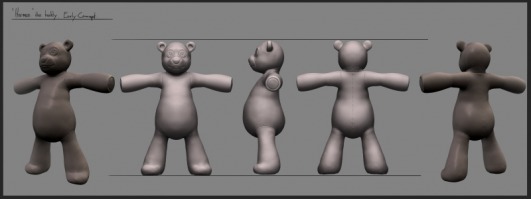
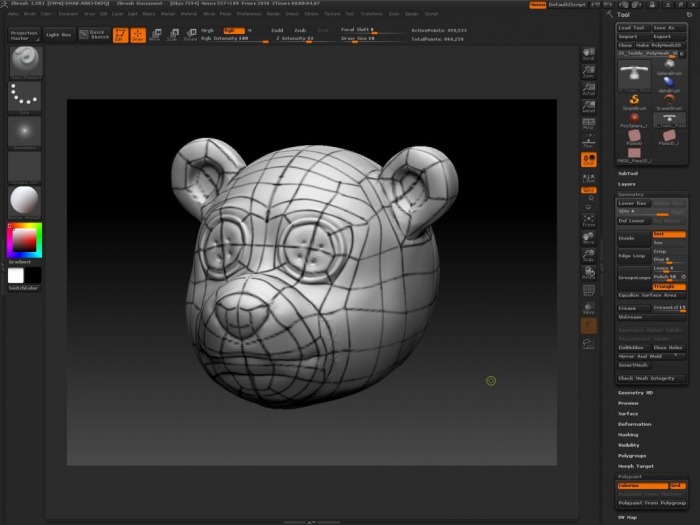
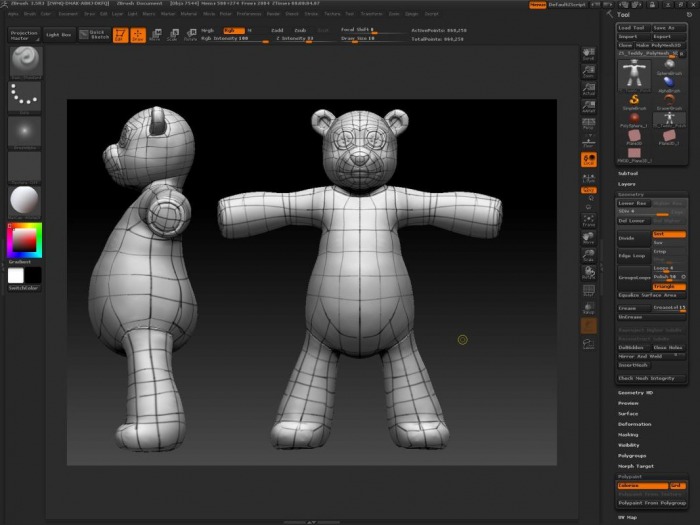
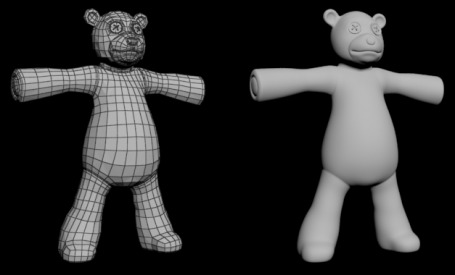
Next step along the way was to model this character. I was so happy that I was given that task. I have only made one character before, so this was a great opportunity to get more experience in modeling and rigging. Before I could start, I needed some drawings to speed up my modeling. Knut said he could take care of it, and he did. He modeled the concept in Zbrush so I could us those renders as guidance references. I took the left and front picture and lined them up and I was ready to start modeling.
Zbrush concept by Knut Eliassen
After a day, I was really happy with my progress. But, I hadn’t taken in consideration that this teddy bear was going to have some heavy animation. The polyflow was not good. Simple as that. I got a tip that I should draw the poly flow on top of the concept pictures. So I did that, and started to model it from the start again.
Early thoughts for polyflow
I showed the model to Knut, and he saw it and told me that it wasn’t what he called optimized. He asked me to model the bear again. At that point, I got a bit pissed to be honest. This teddy was my worst enemy at that point and I hated it big time. But then Knut told me that he would help me. 2 hours later, he had drawn on the polyflow inside Zbrush. He saved the day.
And, no one mentioned to me that I could import that Zbrush model into max, and then use the new polyflow toolset to model on top of the Zbrush model. Hallelujah! Now the modeling went fast. Could just drag out some poly’s here, there, and over here again, and Voila! Model was ready for inspection form Knut. He was much more happy this time, but he did some small changes so we got some more detail overall.
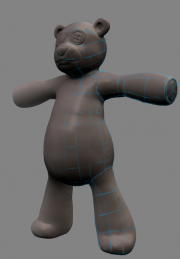
Texture.
Next step to get Herman ready was to texture him. I was thinking of a material like the characters in Shane Acker’s “9”. I thought that would give him a lot of character. But it didn’t look very good, and the others were not happy about it either.
So I needed to create a hairy texture for the teddy. Something close to a standard teddy bear texture. In my head, there were 3 different methods of achieving the result we wanted.
Hair and fur - this would probably look most realistic. You would get physical hair, and a nice fluffy look. But I have never used it in a setting like this. I am not sure about the range of options within hair and fur. So if I wanted to use this, I had to learn it, try and fail a lot. Time I really don’t had. And maybe the most import reason why not to chose this one, render time.
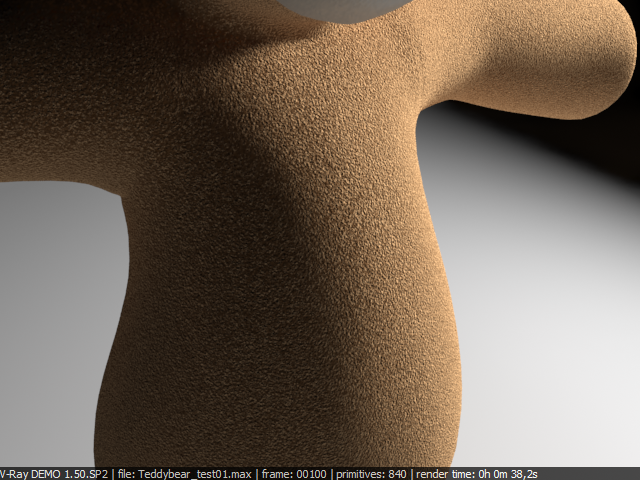
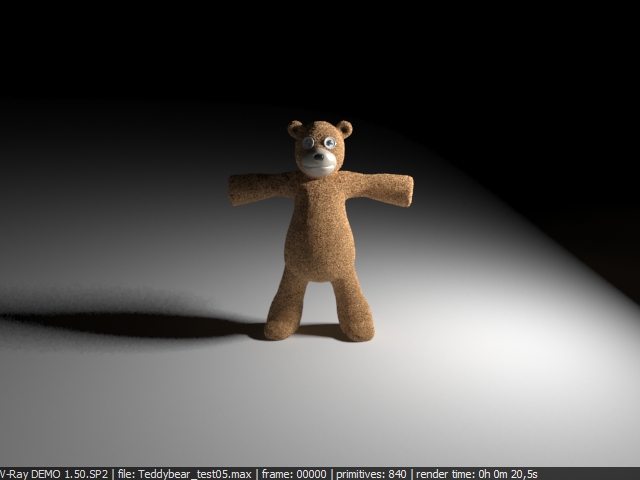
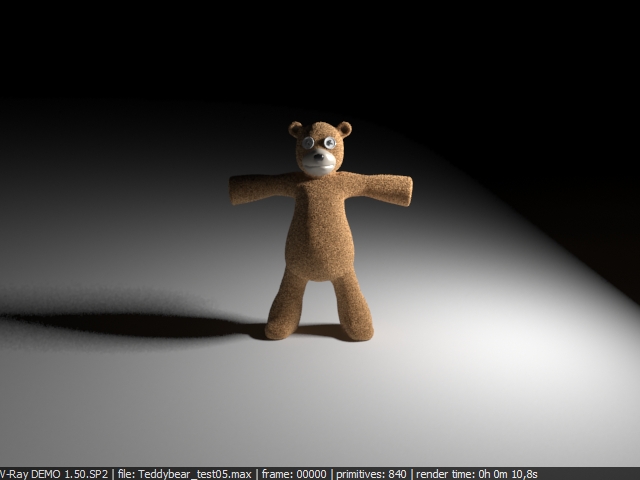
Displacement - to get small little hairs, you need a map that generates black and white dots, with extreme high contrast. The standard map called speckle did that. Here I needed to test a bit before I could make up my opinion. I saw that it looked good, and gave a feel of small hairs. The render time was not bad, but needed to compare it with bump.
Bump - I was thinking that this would give fewer details than the displacement would, but the render time would be better. I used the same speckle map in the bump slot, and got some results. From long distances you couldn’t see much different, but the render time was reduced to half. Close up, you could see some differences that were noticeable.
Conclusion - I did not even bother to try Hair and Fur, even though some wanted to see how it looked. It would have taken too much time of exploring and learning a whole new system. The displacement looks best close up, but from a long distance you cannot see much difference between bump and displacement. So I made two textures, one for close-ups shots where displacement is used, and one with bump, which could be used for long range shots.
Note: animation process has started and it seems that the speckle map do not like that. The texture is going crazy. It flickers and does not look good at all. I think that it is because the speckle map generates a so big contrast between black and white, that the small hairs gets too extreme. The light is not being bounced inside the hairs good enough, so this creates the flicker. We have to use a noise map in the bump slot instead. A cheap solution, but I think we can pull it off.
Experience:
Learned a lot of how important it is to get a smooth and efficient polyflow, and how to achieve it, and I saw how powerful the workflow of jumping from Zbrush to 3ds Max is. Really want to learn Zbrush now.
I have also learned that it is important to try and fail when it comes to texture. You need to know what you need the texture for, and how close you are going to see it. You can save much rendering time if you get the right textures in the right sizes.
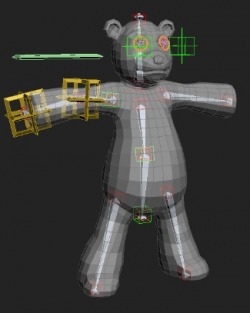
This was the part of the teddy where I was the most worried and felt unsecure on how I should do things. We talked a bit about it, and we knew that we needed a rig we could fully animate, since we have some close up shots where the teddy is falling or being picked up from the ground. But we also have some shots where the girl is running with the teddy, of course you can animate it with a standard rig, but we were looking at the idea of getting some automatic into it. Like a ragdoll type of thing.
My first priority was to get a teddy up and running with a standard rig. I have rigged a character before, but wasn’t sure on how to do everything, and it didn’t make things better when Knut wanted some stretch in some areas of the body.
I needed to ask our favorite rigger in the class, Sebastian Antonsen. He can rig everything, and for the most of the time say yes if you ask him for any help. He doesn’t just give you help, he explains things down to the smallest detail and keeps doing it to you get it. When I asked him about how to get a stretchy leg, he made me this VIDEO.
Everything else on the rig is pretty straight forward, unless the stretch in the spine. IK solvers on the legs and arms, and the eyes are made so they can bump back and forth a bit.
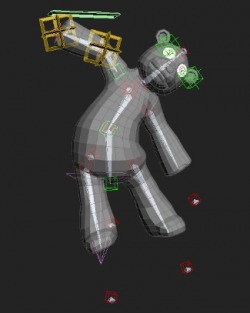
When that rig was done, I started looking for an optional rig that worked a bit more automatically and would make things easier when he is being carried around. I searched the internet for possible ragdolls options, but many of them needed to be simulated with reactor. And we have so much simulation already for the movie, that this would only make things take even a longer time. I had almost given up when Sebastian had sniffed up what I was looking for. He had already made me a prototype of what he was thinking about and showed me a GIF file of it. After that he told me what he had done, and let me have a go at it while he was sitting beside me telling me what to do.
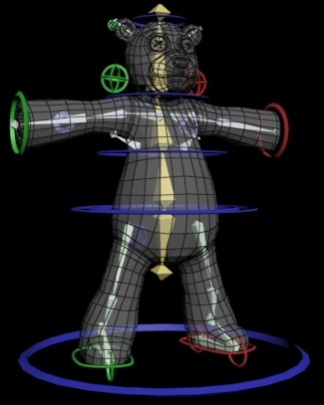
The main idea is that every limb that needs to be automatic thrown around got a spring modifier on it. To achieve a good result, we made the bone stretchy first, so the point would fall down and hang a bit under the limb. This would give a much more of a realistic result and you could add gravity to get even a better result. The only problem with this was that when a kid runs with a teddy bear, it is being dragged after the arm. As you can see here, the dragging point is in the middle of the teddy. I needed to move this up to the arm.
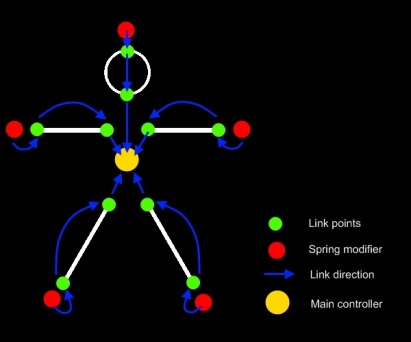
I have tried to show how we did it the first time with a simple drawing. Everything is rigged to the main controller in the middle. The spring modifiers are own LINK POINTS too.
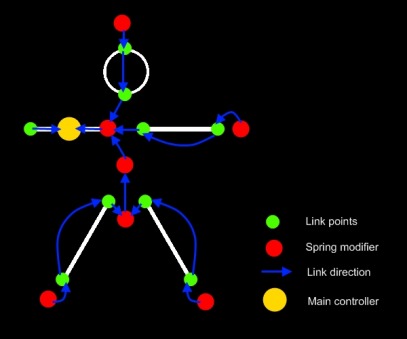
And here is what I ended up with after doing it all over again but by moving the main controller up to the arm of the teddy. The spot where the girl will be holding it when she runs.
That’s basically how I made it. I was really happy with it, but didn’t know how it would react when it is being put in the hand of the girl.
Note: I have tried it now, and after some readjustments it is working okey. Had to remove one of the flex points because it created the teddy to flip totally around when it are being drag back. Because of the missing spring point, the arm seems a bit stiff, so I will try to turn in on again, but then reduce the spring affection.
Experience.
This is the part where I feel I learned the most useful things even though I am not aiming for a career where I need to rig a lot. But I learned to think in a different way, and attack things in bit more efficient way. Been through how scripting can help me do repetitive things faster, how a rig can be done to get things to go more automatically and just how a basic should work when it comes to animation. Loads of small things I won’t mention now. A big thanks to Sebastian Antonsen for teaching me loads of things.
Here comes a post about what style we chose for our movie. It’s not a very big subject to write a lot about, but I feel that I should because it is pretty crucial to our movie. We never had a really big discussion about it, but very many small ones. This is because the style came very naturally for us because of the storyboard. It sat the standard and something to go after.
After Knut’s drawing of different styles for the girl we knew that we wanted to go for a semi-realistic type of style. Since many people interpret words and sayings their own way, I will try to explain what I see as a semi-realistic style.
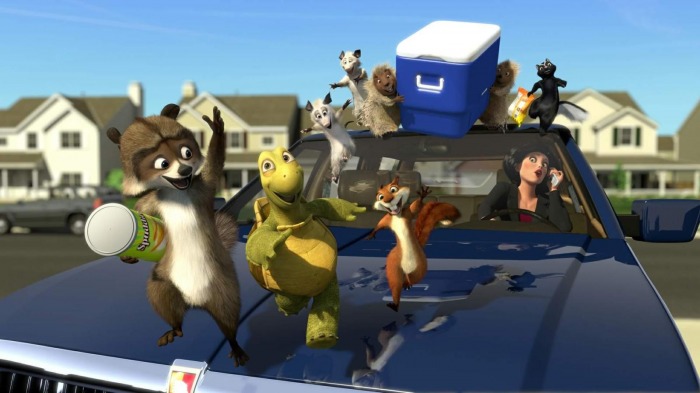
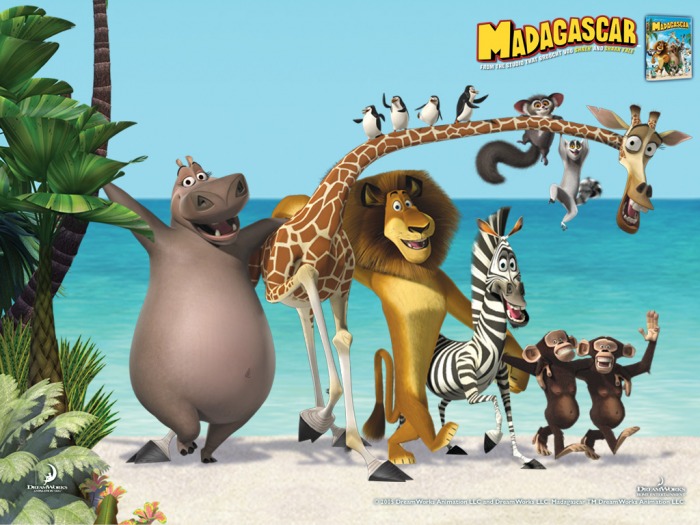
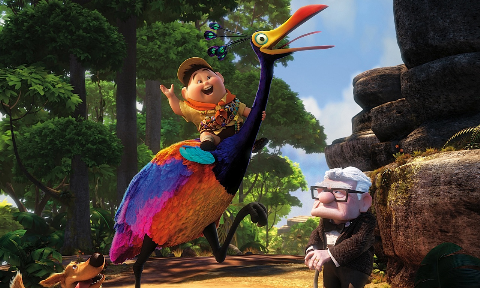
In the one end of the scale, you got what I see as the more cartoony ones. Like the Madagascar movies, Up and Over the Hedge. The animation is very cartoony, loads of squash and stretch and very exaggerated. The colors are very bright and clear and gives a total awesome look, but a bit unrealistic.
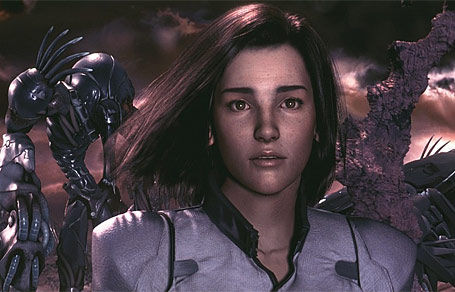
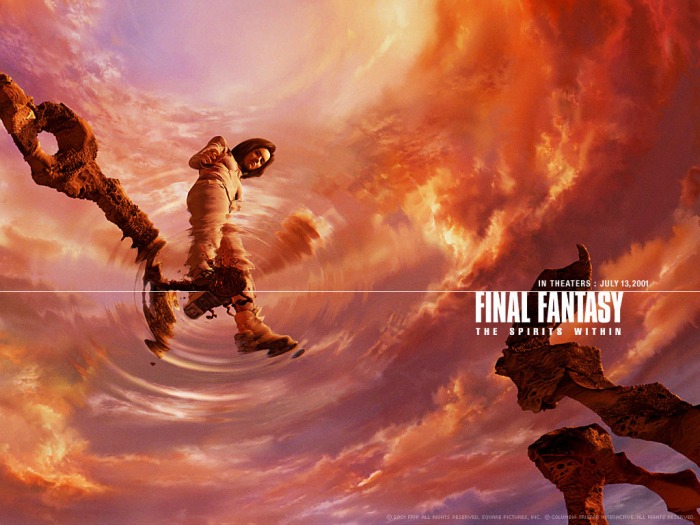
In the opposite end, we got the more realistic movies. Square Pixtures movie called Final Fantasy: The Spirit within. A Japanese movie that was released in 2001, and was aiming for making it as realistic as possible at that time. The main character Aki consisted of 400 000 polygons and had 60 000 hairs. And all was animated. They used a render farm with 960 workstations, something we don’t have. So this style is a bit hard to achieve for a couple of students.
Now that I have established that, it’s easier for you to see what I am talking about. Our main character, she gets a bit of realistic style. We are going to have a SSS (Subsurface Scattering) material on her, so the skin gets a realistic feel. But for the hair, we are using just a modeled hair, not realistic looking at all. But we are using a cloth modifier for the dress, to get a bit of a realistic feel there.
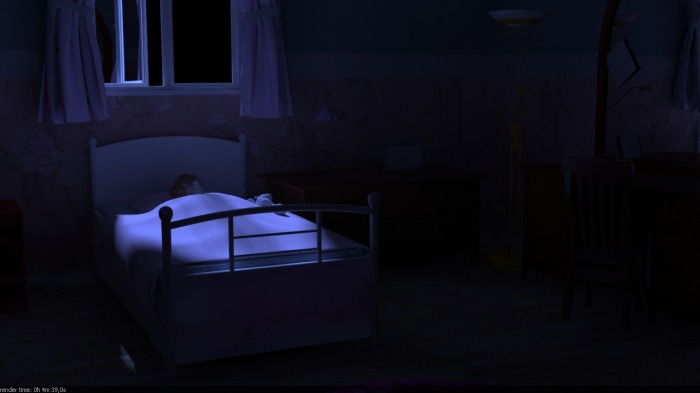
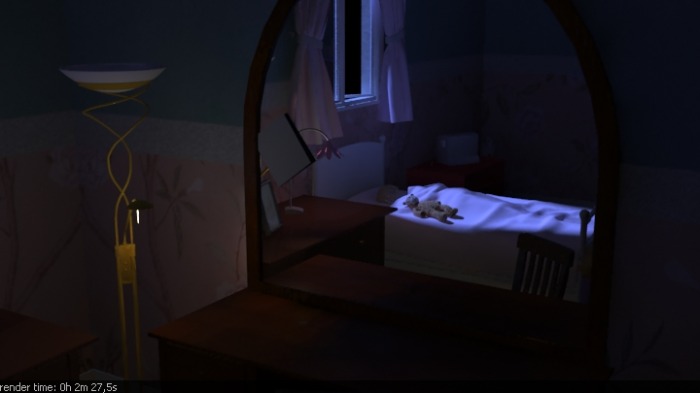
The first scene, her room, got some very bright colors and got a purple tone. Things are realistic modeled, but the height of the roof is not. We had to get more space between the floor and the roof to get the look we wanted. The lighting is a bit bright, just so you can see the smoke better.
Note: these are only test renders, not the finished thing.
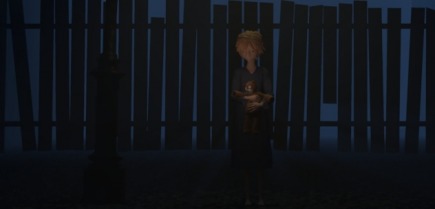
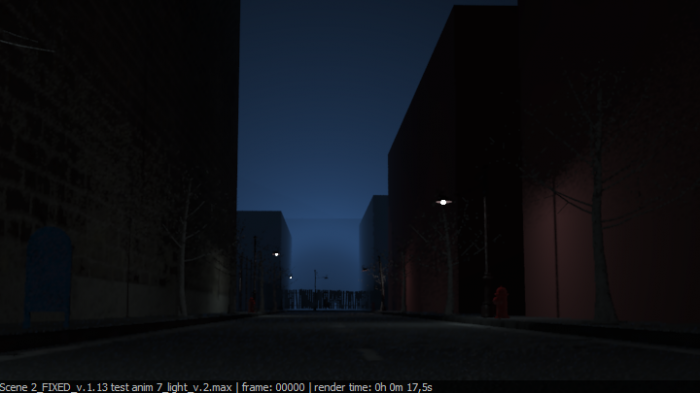
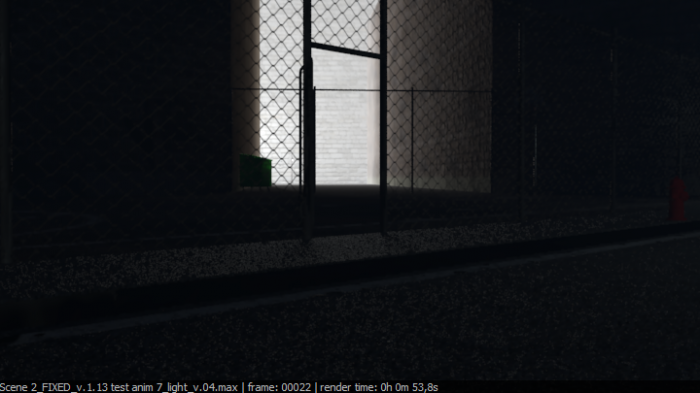
The scene where she is outside is going from realistic to really unrealistic. Since we did not want people to understand that she is in her imagination, we starts off with a bit realistic feeling to the texture and lighting. But when she is getting closer to what I refer to as “The Heaven Street”, it is getting whiter and whiter, and the things as lampposts and garbage containers disappears.
Note: these are only test renders, not the finished thing.
The animation can be done in many different ways, but here we are going for a much more realistic way of doing it. Although the girl and the teddy got possibilities to squash and stretch, we do not want to use them as much.
So, to wrap this up. Our movie is trying to be realistic in some ways but in others not. I think that we have managed to get the right feel with the style we chose. Something is always being changed in the last minute, but I think that we are pretty clear on what road we have chosen.
The day had to come. We needed a name, and had postponed it too long I think. At the start it was okey to work with a movie without a title. You really don’t care what it is named because you are so busy modeling, animating, and texturing. Why we needed a name now? Well, we are about 5 weeks from delivery, and it’s time to start to promote our movie a bit. Create some buzz. And it dosen’t really looks so good if you call the movie “working title” or “blank”. What is need of a title of a movie? Actually nothing. It’s only a word that people will remember if the movie was good, or extremely bad. But I think it’s good to have a title that suits the movie, and don’t send the audience in totally wrong direction.
As a take a quick glimpse at my DVD’s, I can see that it is not many poetic titles, but that doesn’t mean that it isn’t good. One common thing some of the titles are that is says specific something about the movie. For example, Saving Private Ryan and Kill Bill give you the goal of the movie.
Con air, The rock, and Fight Club. Not exactly creative at the best, but it is something you remember and suits a action movie well. The Last Samurai is a bit more poetic.
Well, want a title that is a bit poetic, strong, and that is easy to remember. I feel that one word title is best. But then it needs to be good. Long time ago we made a document where we could fill in name if we come up with something. Now it was time to clean the some dust away and open it. And oh, we had written loads of crap. But when you are supposed to find a name, you shouldn’t think too much. Just let the creativeness float and you will come up with a golden name in the end.
These are the names that we had written down:
Finding Life
Faith of Life
Life to be found
The darkness of life
Lifeless
Survive
Life
Survive Life
Not yet...
Facing Death
La Calma del Infinito
Beyond the Veil
The fear within
Return to me
A teddy tale
The Darkness in the Veil
Knowing
Allways waiting, allways with you
Plana del Infinito Calma
The epic journey of a little girl trying to find her way in the plane between life and death
We will meet again
I'll be waiting ( here, for you (i dunno?))
Some of these words did catch our eyes when we opened the document. Life, Death, Veil, Fear, Within.
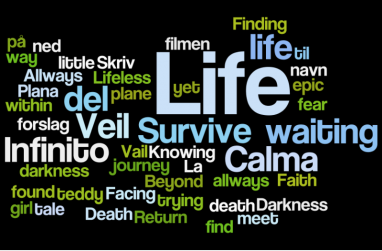
To help us a bit, we used a site called wordle.net. You throw a lot of words in, and get a nice picture back that contains all of your words randomly put together.
We wanted a name that told something about our movie, but didn’t reveal the story. If you kinda know what I mean? So the discussion went on, and we come up with a new list of names.
A. Infinite Knowing B. Fear of Life C. Lifeless fear D. Journey Beyond E. Veil of Life F. Beyond Life G. Faith Within Darkness H. Fear Within the Darkness I. Path beyond the Veil J. Strings of Love K. Truth beyond the Veil of Fear/Darkness L. Truth of life M. Fear beyond Knowledge N. Darkness of Life O. Lifeless Despair P. Calm within Faith Q. Fearfull Faith R. Love beyond Fear (Death...?) S. Truthfull Darkness T. Facing Fear Within U. Trails of life/death V. Fear within life/death W. Shadows of life X. Return of Light Y. Light of life/death
They name got more poetic and much deeper. But still, some of us wanted a name that was easy, and with punch. So our 3 last suggestions were:
#1: VEIL OF LIFE
#2: DESPAIR
#3: BEYOND FEAR
Down to 3! But it isn’t easy to choose even though its only 3. I felt that Veil of Life, was a poetic and deep name. It can’t be interpret in many ways, and that is why it is a good name. Despair are also a deep name, but much easier. I got punch, and look good. This was my favorite for some time. I think that Despair describes the feeling of the girl. Beyond Fear is not that poetic and deep, but it is more of an action title I feel. Its catchy, got action written all over it and it is a good title.
We couldn’t agree on a movie name, so we voted and Veil of Life won. It suits the movie well.


 RSS Feed